Intent
Intents refer to the purposes or goals communicated through customer input, such as answering a question or processing a bill payment. By recognizing the expressed intent, Lynn can choose the correct dialogue flow to address that specific intention.
Fields that make up an Intent
[Name]: A mandatory field where the name of the intent should be entered.
[Minimum Acceptance Percentage]: This field allows indicating the acceptance percentage, determining how confident the system must be that it correctly understood the user's intent before taking a specific action. This threshold indicates the minimum matching percentage between user input and the system's default intent to consider the understanding secure enough to proceed with the corresponding action.
[Cognitive Context]: A list-type field that allows selecting the context related to the corresponding tenant to be used by the intent being created.
To create an intent, follow these steps
-
Access the flow designer of the Lynn application (tenant).
-
Within the flow designer, right-click with the mouse. A contextual menu will open, including the option to create an intent.
-
From the dropdown menu, select the "Create Intent" option. This will open the intent creation form.
-
In the intent creation form, you will see fields that need to be completed. Ensure you provide the necessary information accurately.
-
After completing the fields, confirm the creation of the intent. You may need to click a confirmation button or follow a specific process depending on the flow designer interface.
-
Once the intent is created, you can view its associated ID. This unique identifier is important for future references and tracking.
Example of creating an Intent
-- Input
[Name]: I_greeting
[Minimum Acceptance Percentage]: 0.2 ---> 20%
-- Result
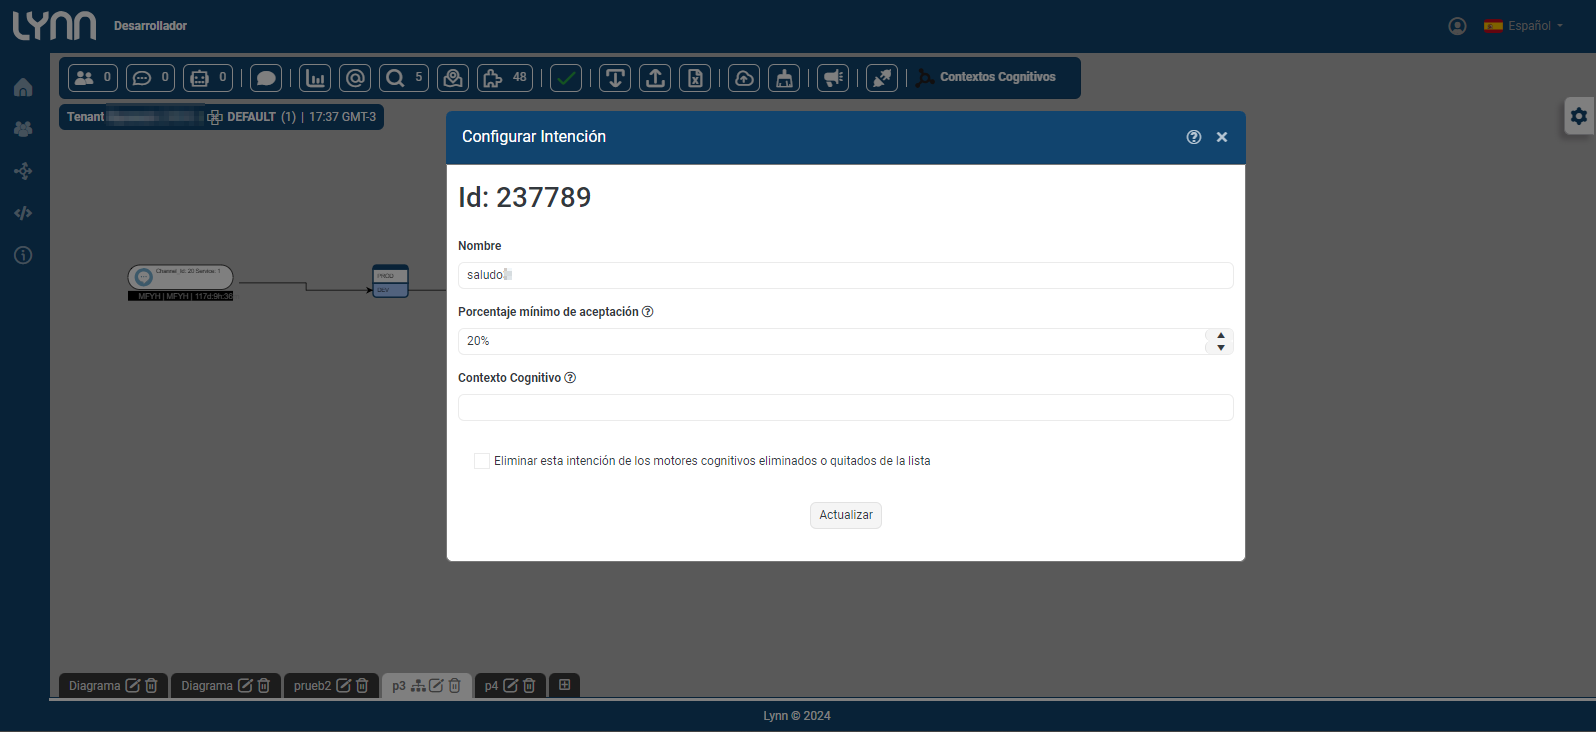
Intent - Configurations
When creating an intent, you can access the following configurations:
Edit: Opens the intent configuration window, where you can modify the name, Minimum Acceptance Percentage, Cognitive Context, and check to delete the intent.
Training: Opens a window to add the expressions that the customer writes, which will be evaluated by the selected cognitive context.
Note: It is important to remember that to add this cognitive context, it must be previously created. You will not visualize cognitive contexts to assign.
Note: If you do not have cognitive contexts, the assignment option will not be visible.
Import Cognitive Actions: Displays a confirmation window where you must select the option to import actions or update actions. It is important to remember that updating will generate new actions and delete previously imported actions.
Default Routing: Displays the default routing configuration window for intents. These can be:
- Execute at the beginning when there is no cognitive context.
- Execute when there is an error in cognitive evaluation.
- Execute when a customer arrives deflected to Lynn.
- Execute when you want to identify a customer for deflection.
- Execute when a general error occurs.
- Execute when the intent is not configured in Lynn.
- Execute at the beginning when the interaction is voice.
- Execute when confidence in cognitive evaluation is low.
- Intent to execute in the bot file.
- Related Elements: Displays a window with a list of related elements associated with the intent.
Remove from Diagram: Displays an option to individually or collectively remove the intent.
Copy to Another Layout: Displays a list of existing layouts and allows the user to select the desired location for copying.
Move to Another Layout: Displays a list of existing layouts and allows the user to select the desired location for moving.
Element PAP: Displays the production pass window, where an email will be sent to the user with the verification code for confirmation of this process.
Select Element for PAP: Displays the production pass window, where you can select only that element or more to be sent to PAP.
Element History: Displays the history window of the selected element.
Lock: Allows locking the selected intent. Once locked, this same button allows unlocking.
Delete: Allows deleting the selected intent.
Copy: Allows copying the selected intent.