Step to Production
The production step tool is designed to manage all configurable and manageable resources across different environments: Development and Production. These environments allow users to view elements by categories or individually, facilitating the migration of changes from the development environment to production.
In the development environment, users with roles higher than editor and with "Basic Flow Designer" certificates will have access to create, update, delete, and read the configurations of each flow component. However, in the production environment, no changes can be made to the developed flow. It will be limited to visualization and configurations specific to the production environment, such as setting productive channels, viewing reports, and configurations like maintenance windows, among others.
Groups for Production Step
- Widget: Allows deploying changes associated with the theme editor style and configurations. This option is displayed when clicking the widget icon, which allows access to the deploy option.
- Application (Tenant): Represents the macro of all elements and categories related to the application. Clicking the Tenant icon will display the following options:
- Cognitive: Displays a list of selectable cognitive contexts for deployment.
- Users: Allows deploying all users and the corresponding registration between environments.
Tenant Group:
-
Flow: Allows deploying all elements associated with the flow, except channels. These are presented in subcategories such as: Intents, entities, actions, and cases.
-
Kyubo: Allows deploying resources associated with Lynn's message center, presented in subcategories like: Workgroups, skills, and agents.
-
Campaigns: Displays a list of existing campaigns in the tenant, selectable for deployment.
Flow Group:
-
Intents
-
Cases
-
Actions
-
Entities
-
Tenant Configurations
Kyubo Group:
-
Workgroups
-
Skills
PAP Menu Options
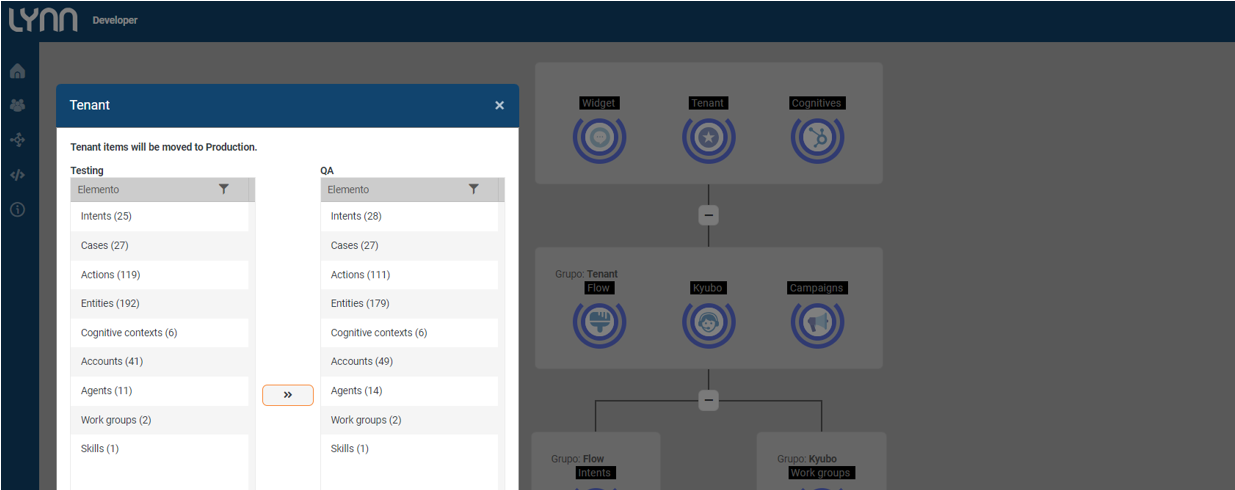
Deploy Option: Allows deploying all application components. Selecting the “Deploy” option will display two tables: source table (Development - Testing environment) and destination table (Production). The source table will show the total components to be deployed to production, and the destination table will show the currently available components or elements. If it is the first deployment, the destination table will be empty.
1.- To proceed with the deployment, select the “Deploy” button (>>) shown in the following image:

1.1 .- Three-Environment Deployment: For tenants with the QA environment enabled, the source and destination names will change, showing Testing as the source and QA as the destination. Finally, to make changes available in the Production environment, access the QA environment and promote its elements from QA to Production.
2.- When performing this action, Lynn will send an email with the verification code for the deployment. Check your inbox for an email sent from the official address (administrator@lynn.cx):
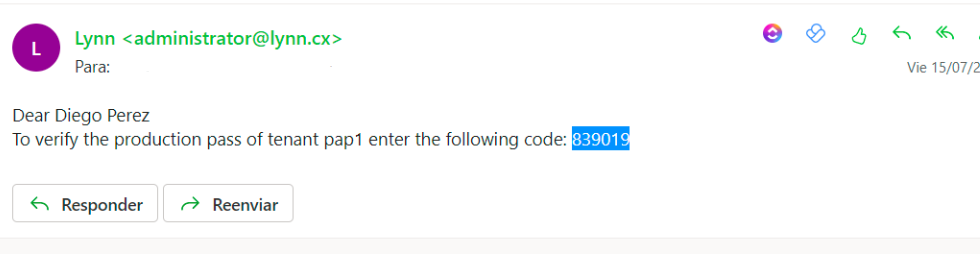
3.- Use the verification code in the “verification code” field, then confirm the deployment with the “Confirm” button.
4.- After confirming your deployment, you will be notified that the process has started. Wait until the progress bar reaches 100%, indicating that your deployment has been successfully completed.
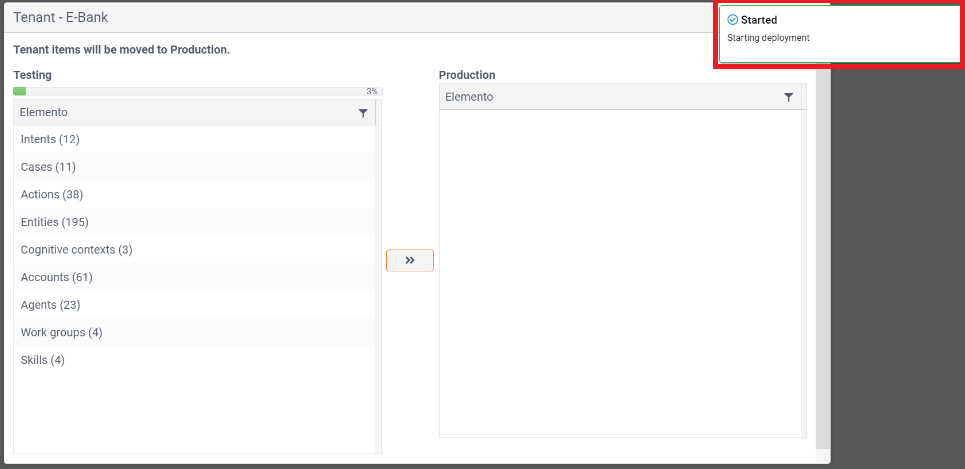
5.- Wait 10 seconds for your destination table (Production) to update to verify your changes, or go directly to the production environment to see that your components have been promoted.
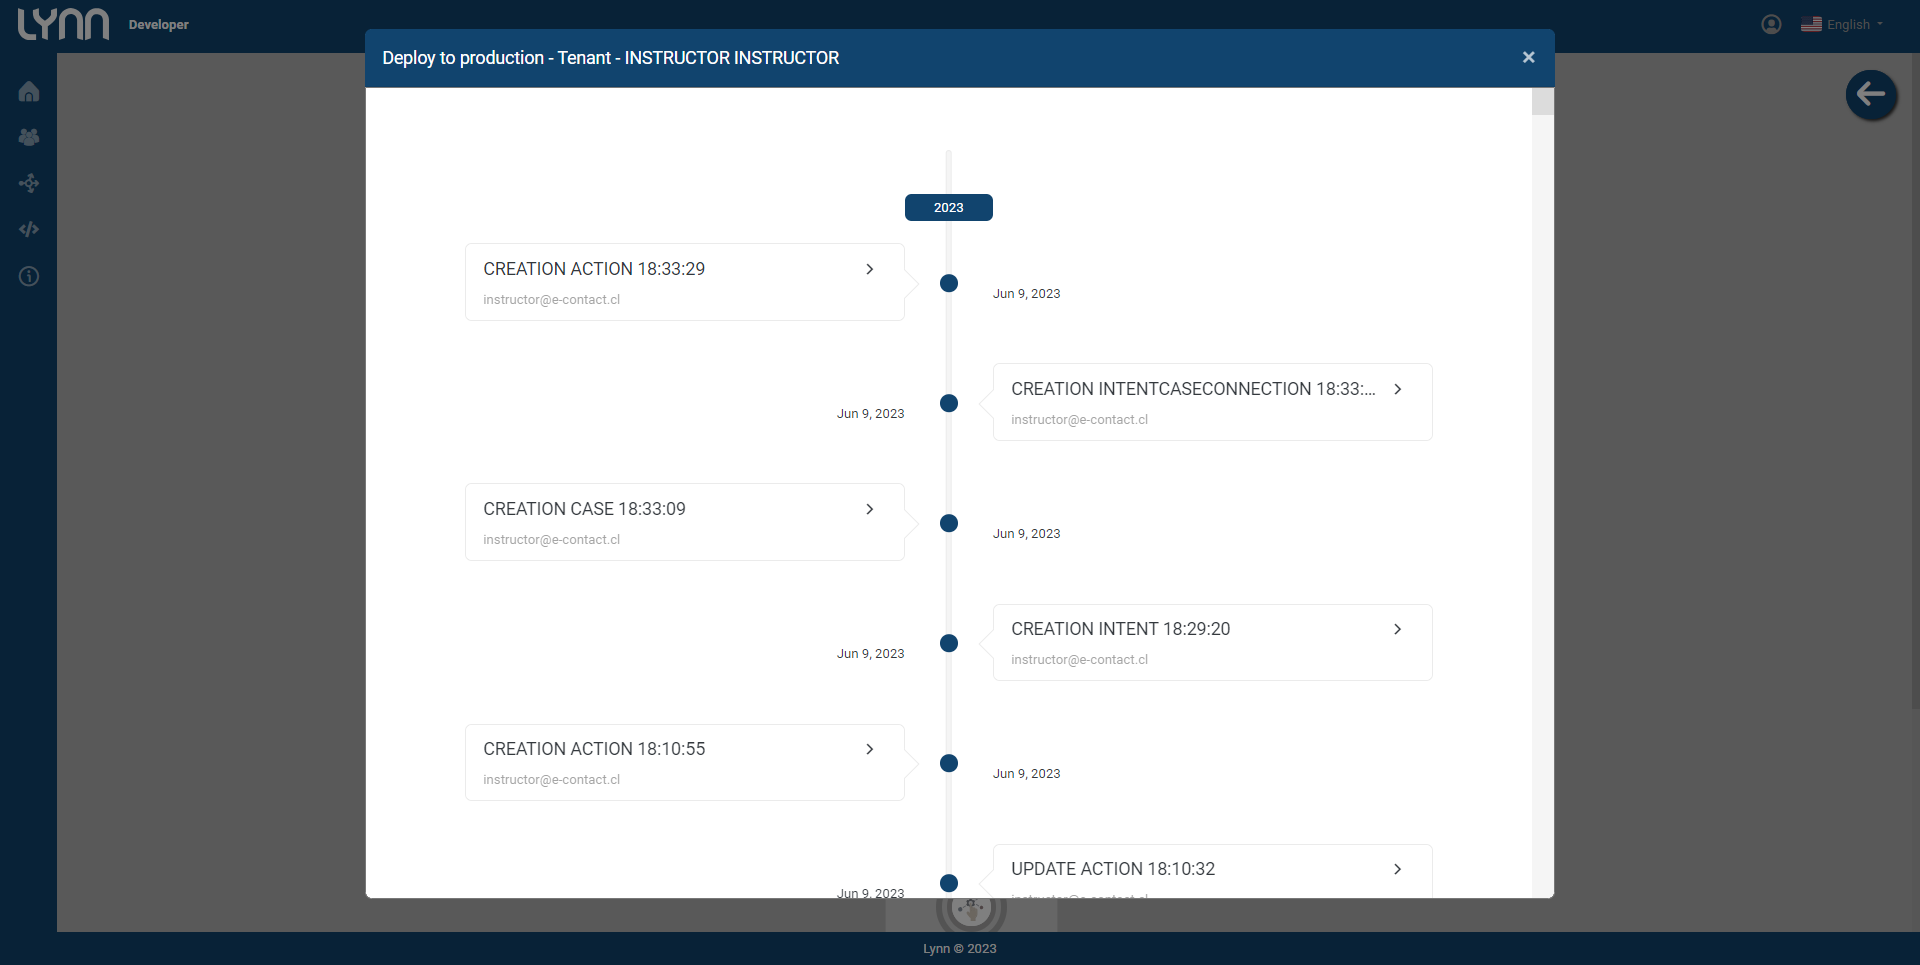
History Option: The application history option shows a summary of the latest deployments made in this application and identifies the date and user who executed it.
Backup Download Option: Allows you to download a state save or "snapshot" from the requested environment. Apply Backup Option: Allows you to apply a backup (Backup or snapshot) to the environment, restoring its state to a previous one. Backups Option: Every time you perform a deployment, Lynn automatically saves a backup of the destination (Production). In the “backups” option, you can download and access information from the last 20 deployments. Beyond this amount, the oldest record will be deleted.

Note: Important about Automatic Snapshots: When performing this process, note that Lynn generates an automatic backup called "Snapshot". These are automatically created at 15-minute intervals between backups. For example, if you perform a deployment at 12:00 PM, a snapshot will be generated. If you perform another deployment at 12:10 PM, no new snapshot will be saved. However, if you perform a deployment at 12:20 PM, a new snapshot will be automatically generated, as 15 minutes will have passed since the last deployment.
Deployment in Lynn
Below, the step-by-step use of the element management tool between environments is detailed, which is responsible for managing deployments (PAP) in the different environments of Lynn.
Direct Production Interface Process
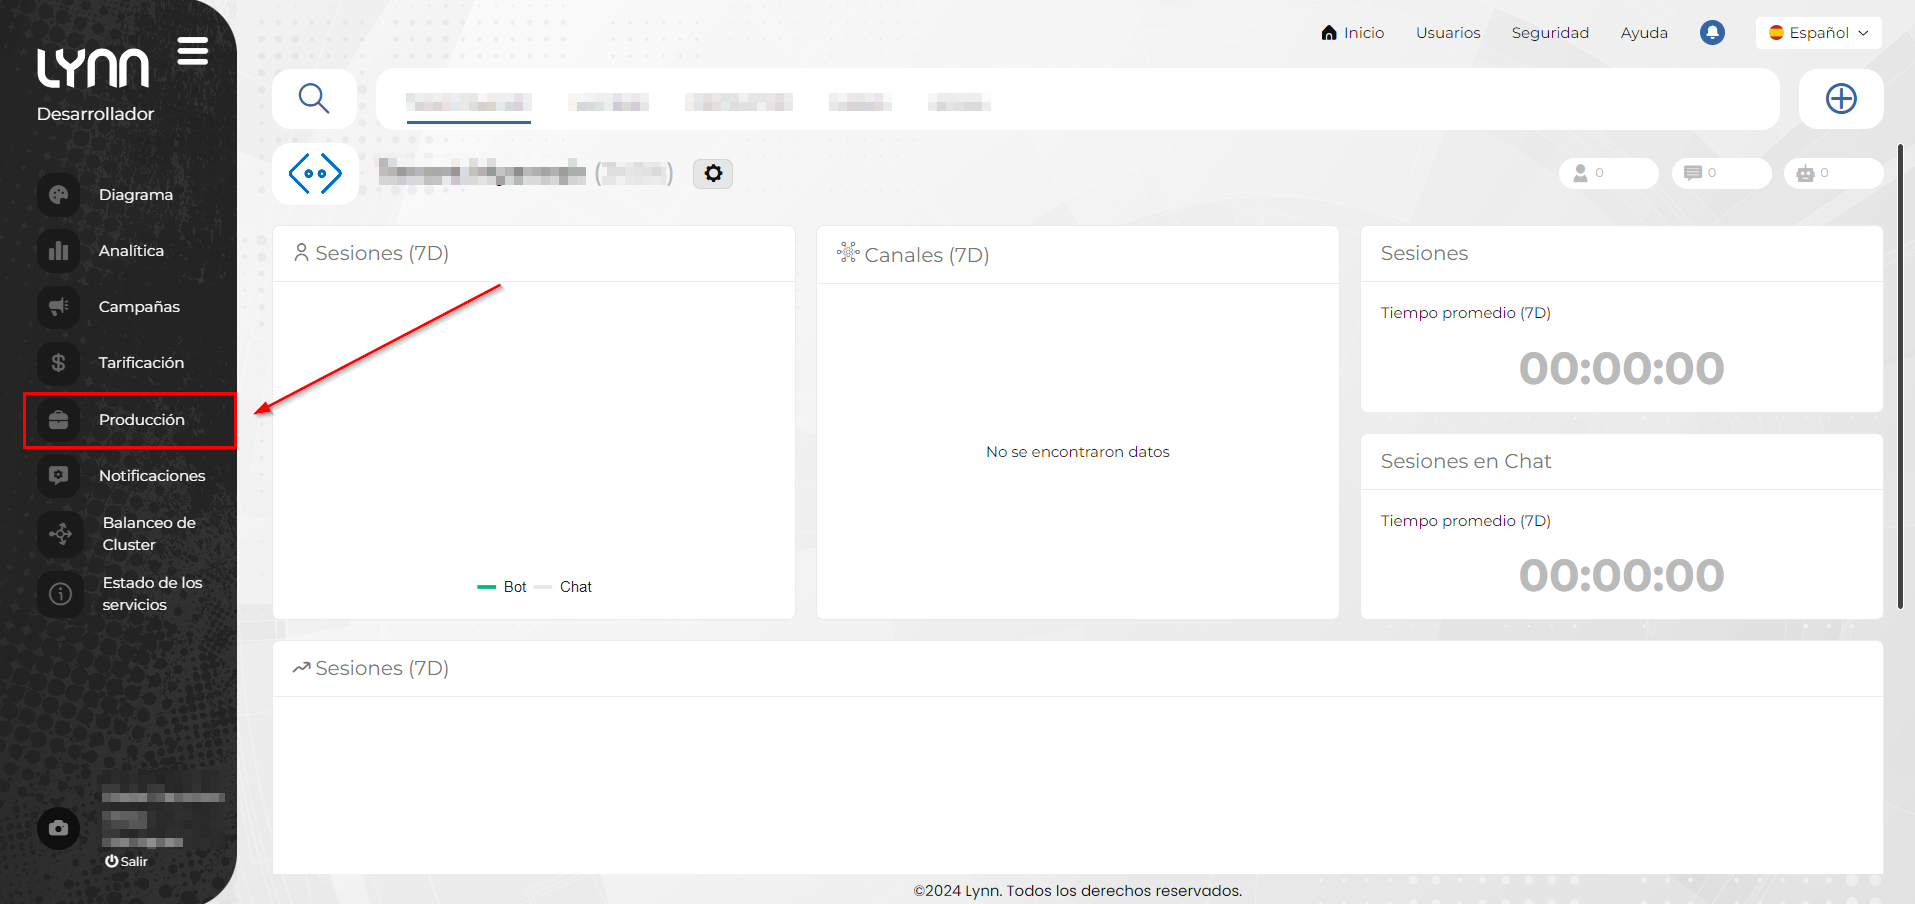
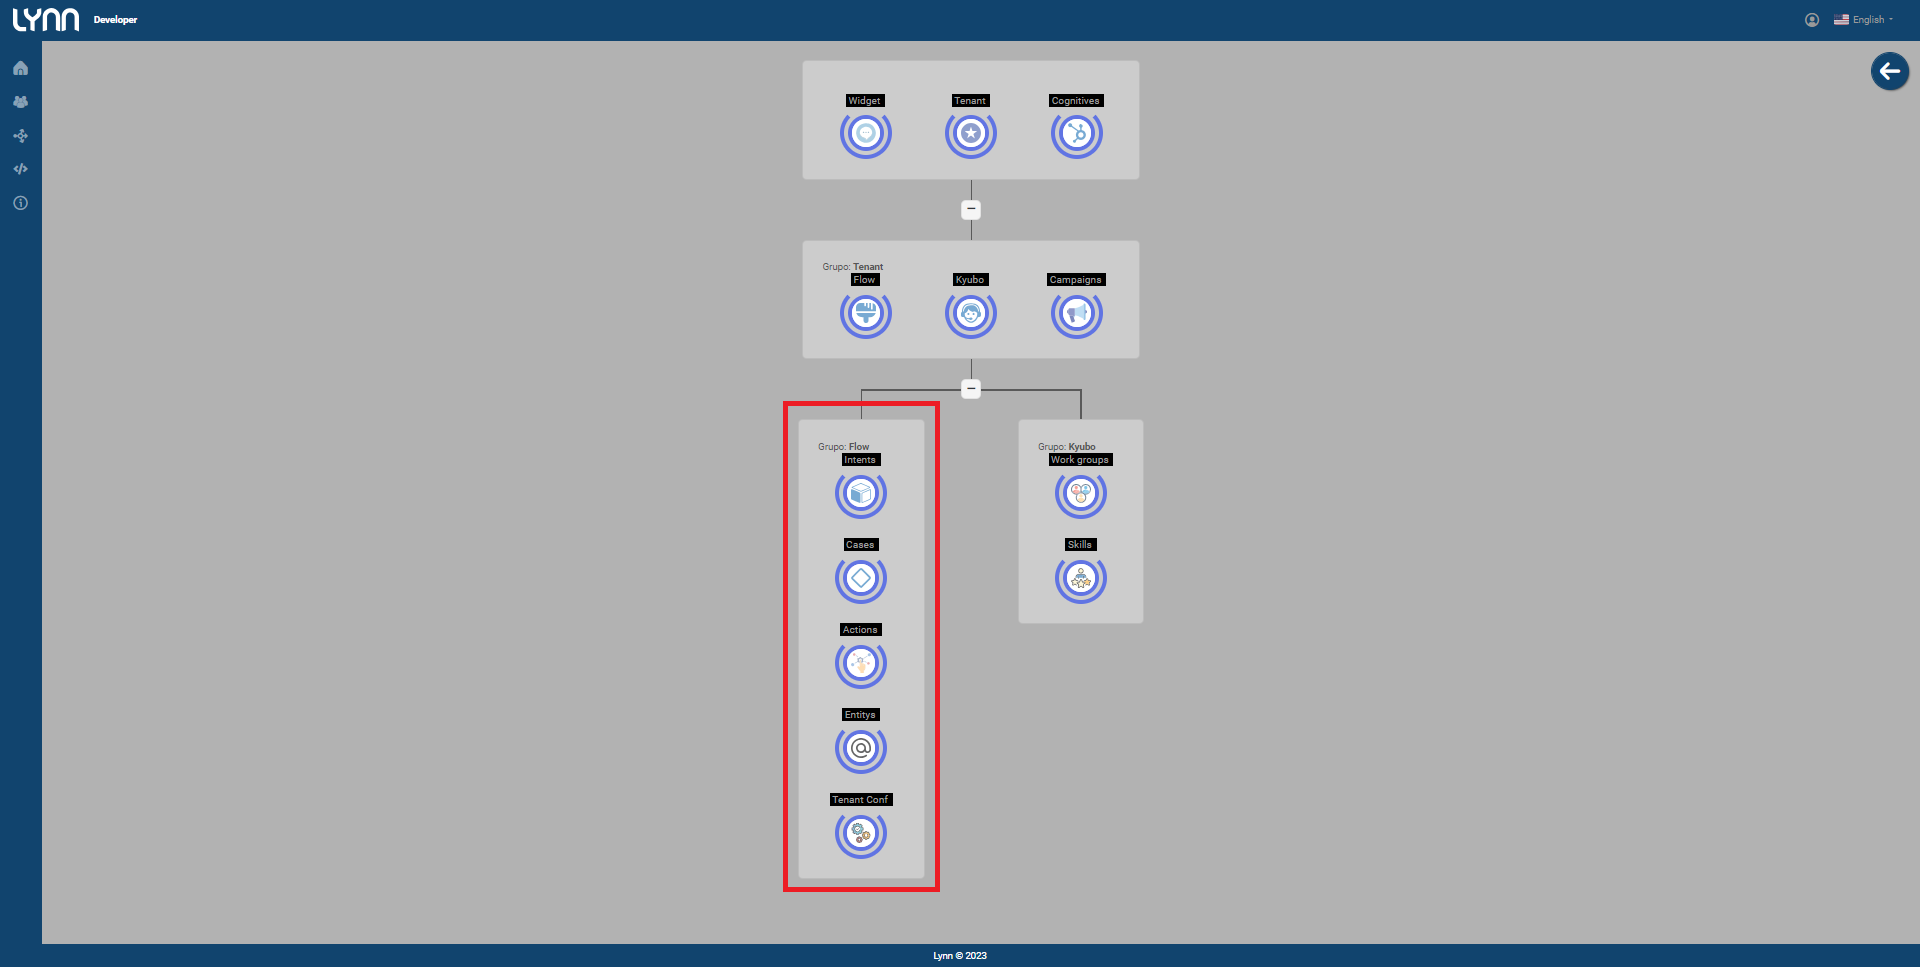
- On the left side of the Lynn application interface, locate the “Production” icon.
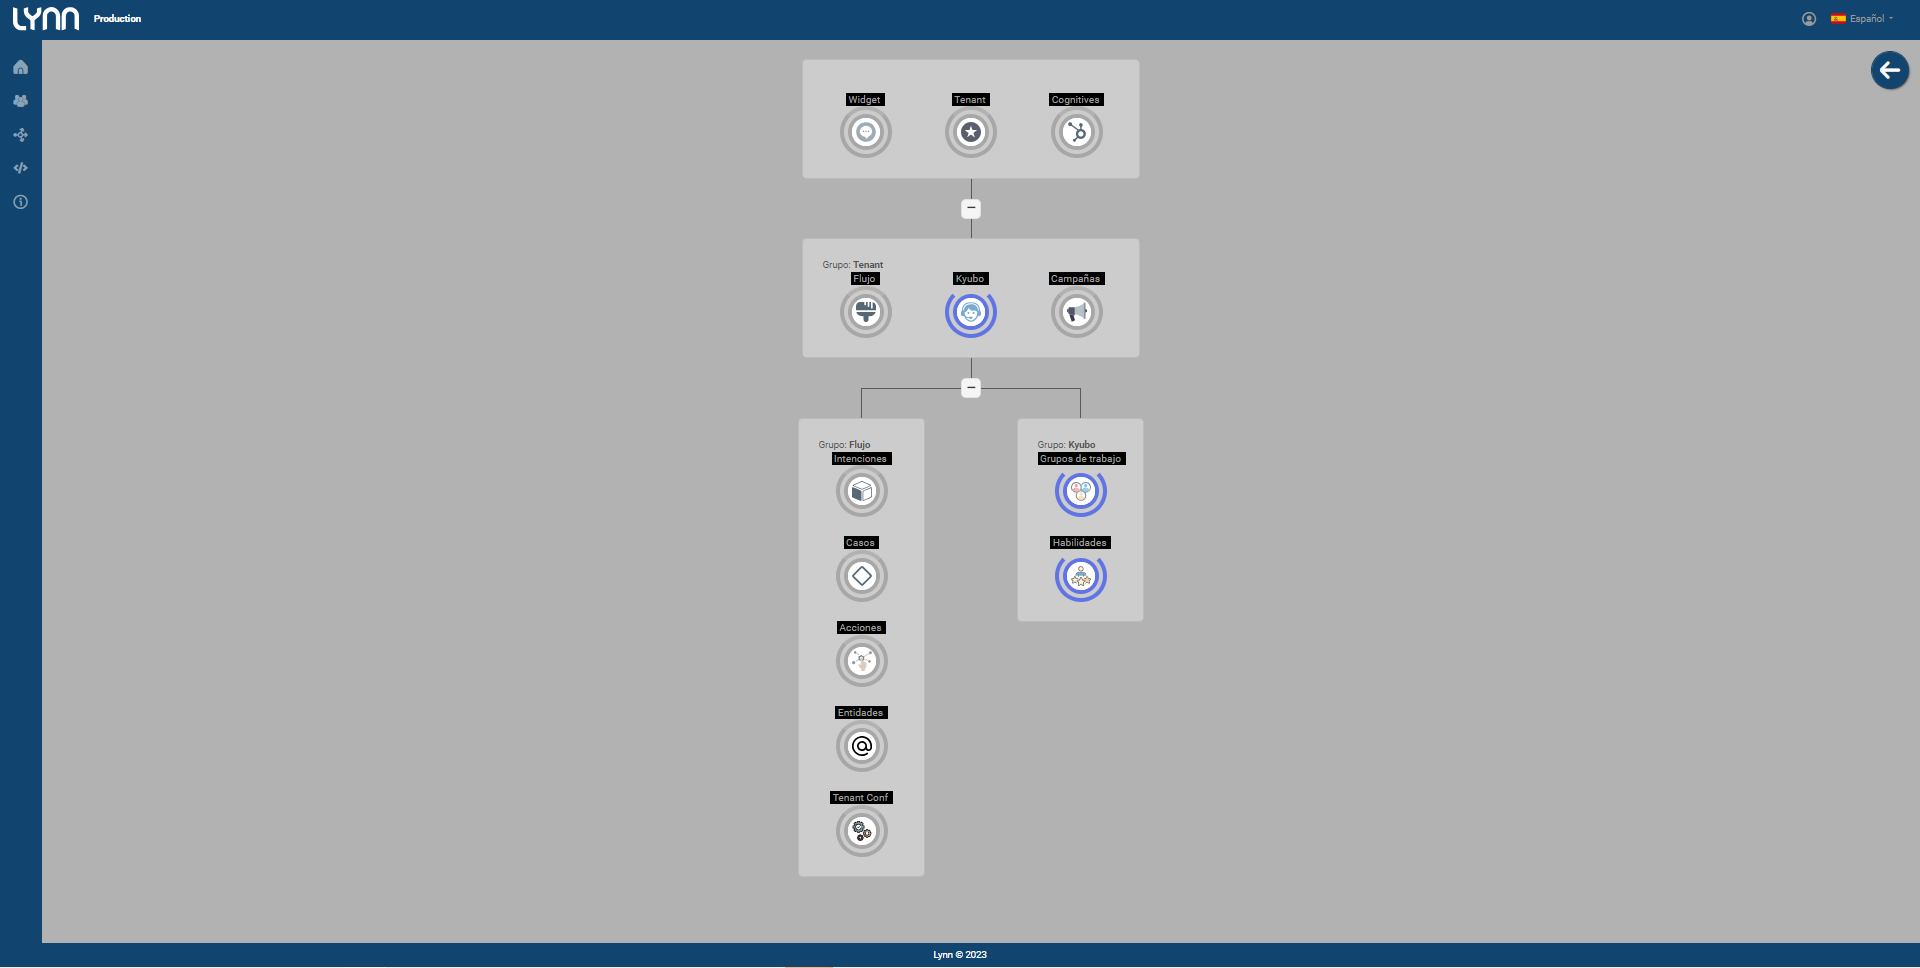
- You will see the organogram of all components within the application (Tenant) or a particular component available for deployment. To perform a deployment, simply click on the element of interest and request its deployment.

Note: If the option is not available, you should contact Lynn support and request access permissions.
Flow Designer Process
- Access the flow designer corresponding to the tenant where you want to perform the deployment.
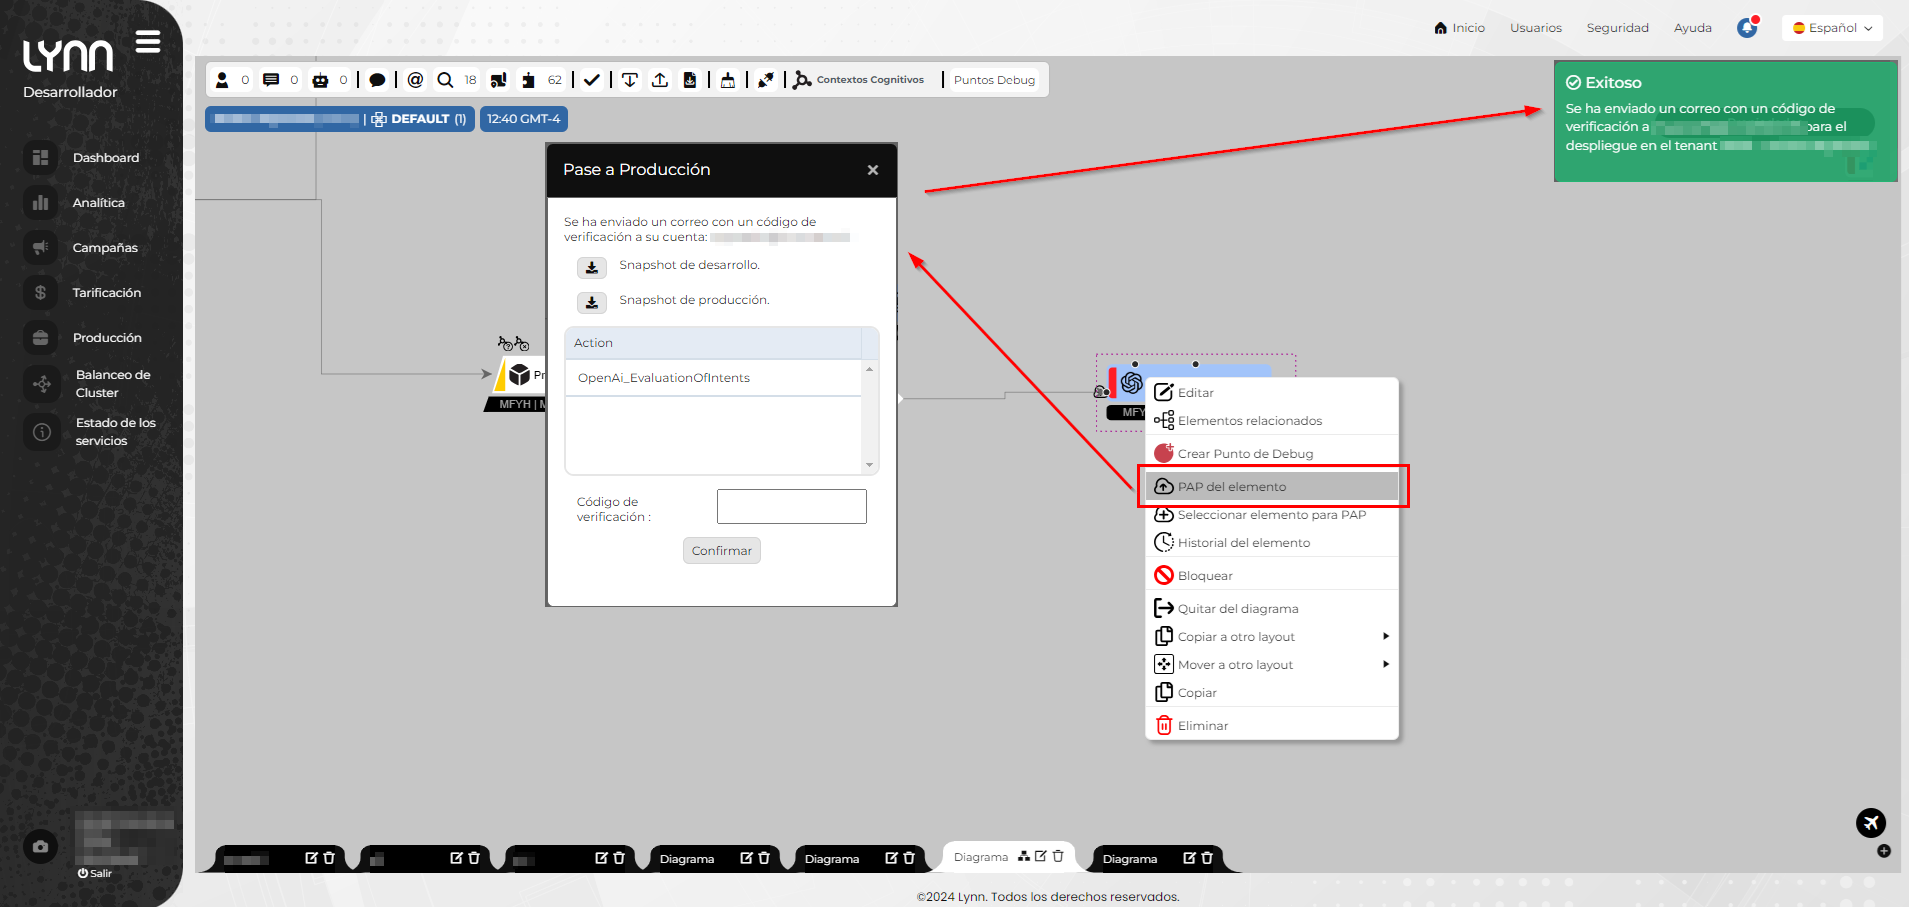
- Identify the element of interest, right-click on it, and access the option "Element Deployment".
- You will see the deployment window and a successful email notification.
- You will receive an email containing a verification code. Remember that the email address where you will receive the code must be entered in your account settings in the Lynn application.
- Enter the verification code in the "Verification Code" field of the deployment window.
You can also perform deployments of multiple selected elements. To do this, right-click on each element and select the option "Select Element for Deployment". After selecting all the elements you want to deploy, click the "Go to Deployment" button.
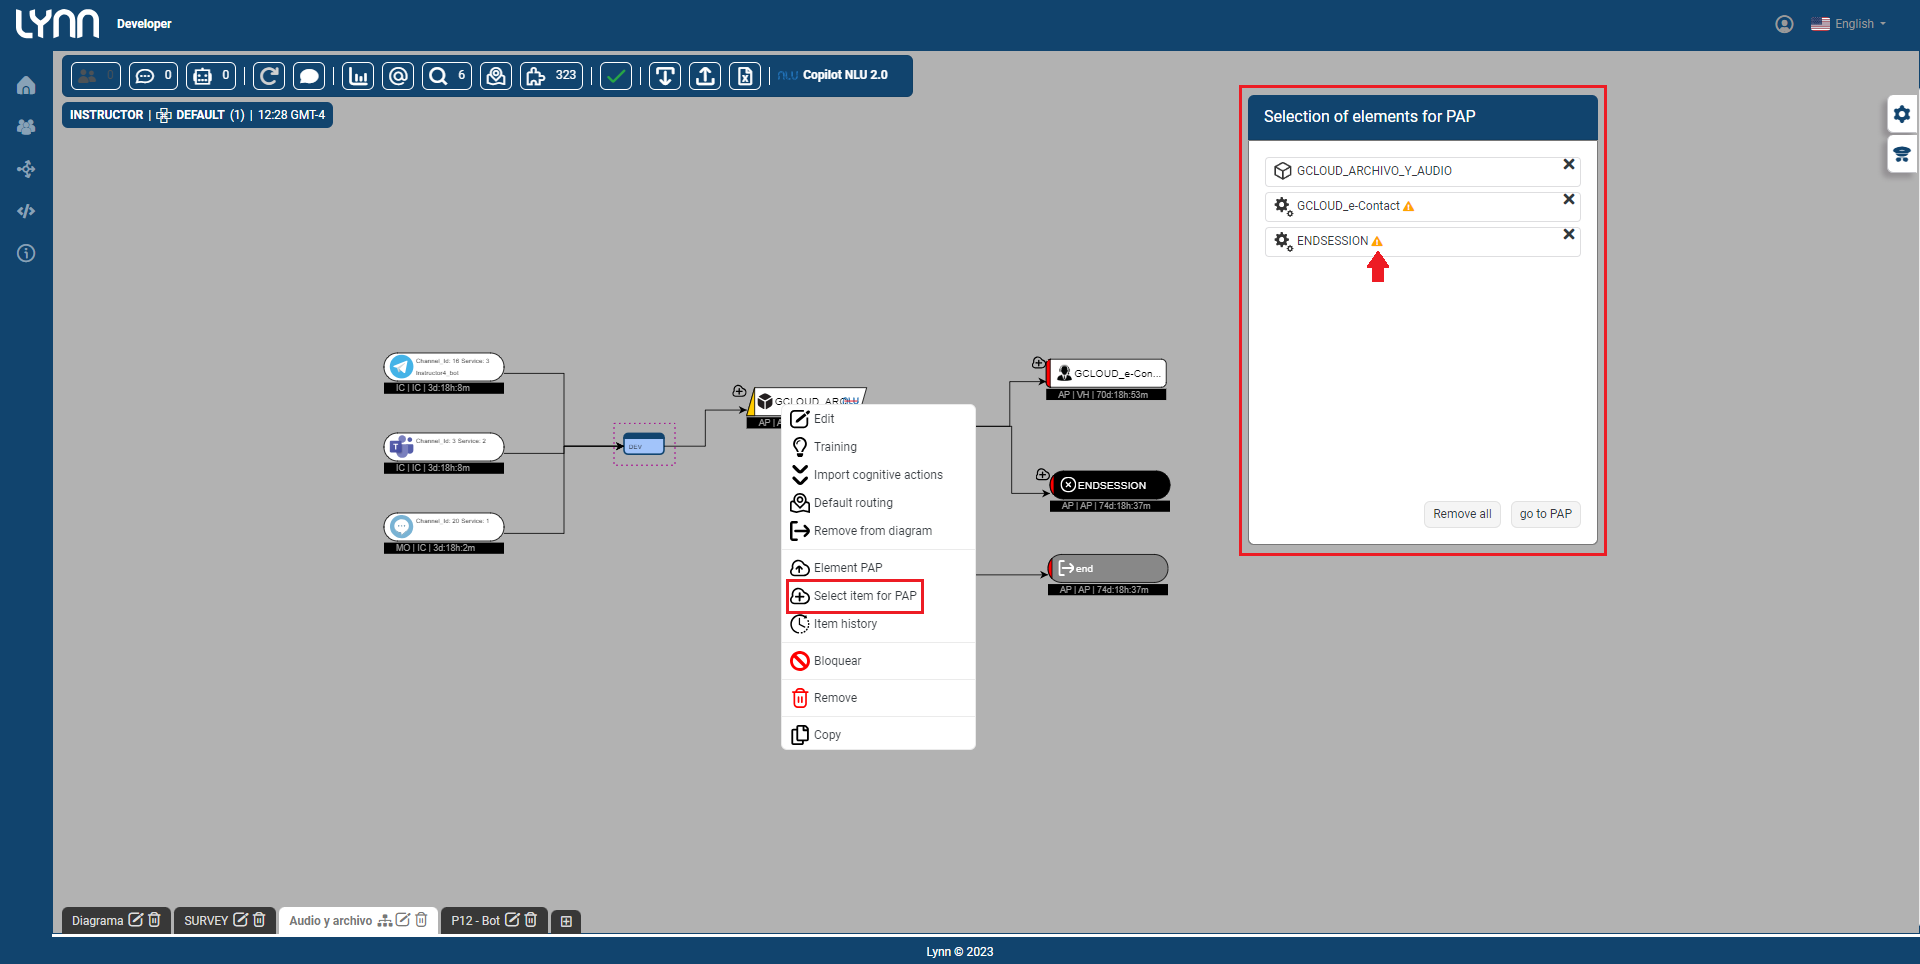
Note: Elements marked with a warning are already considered for deployment, so they can be removed from your list.
You will be redirected to the deployment interface, where the organogram of your Lynn application representing the existing elements will be shown, and the elements selected in the flow designer will be represented by the corresponding icon.
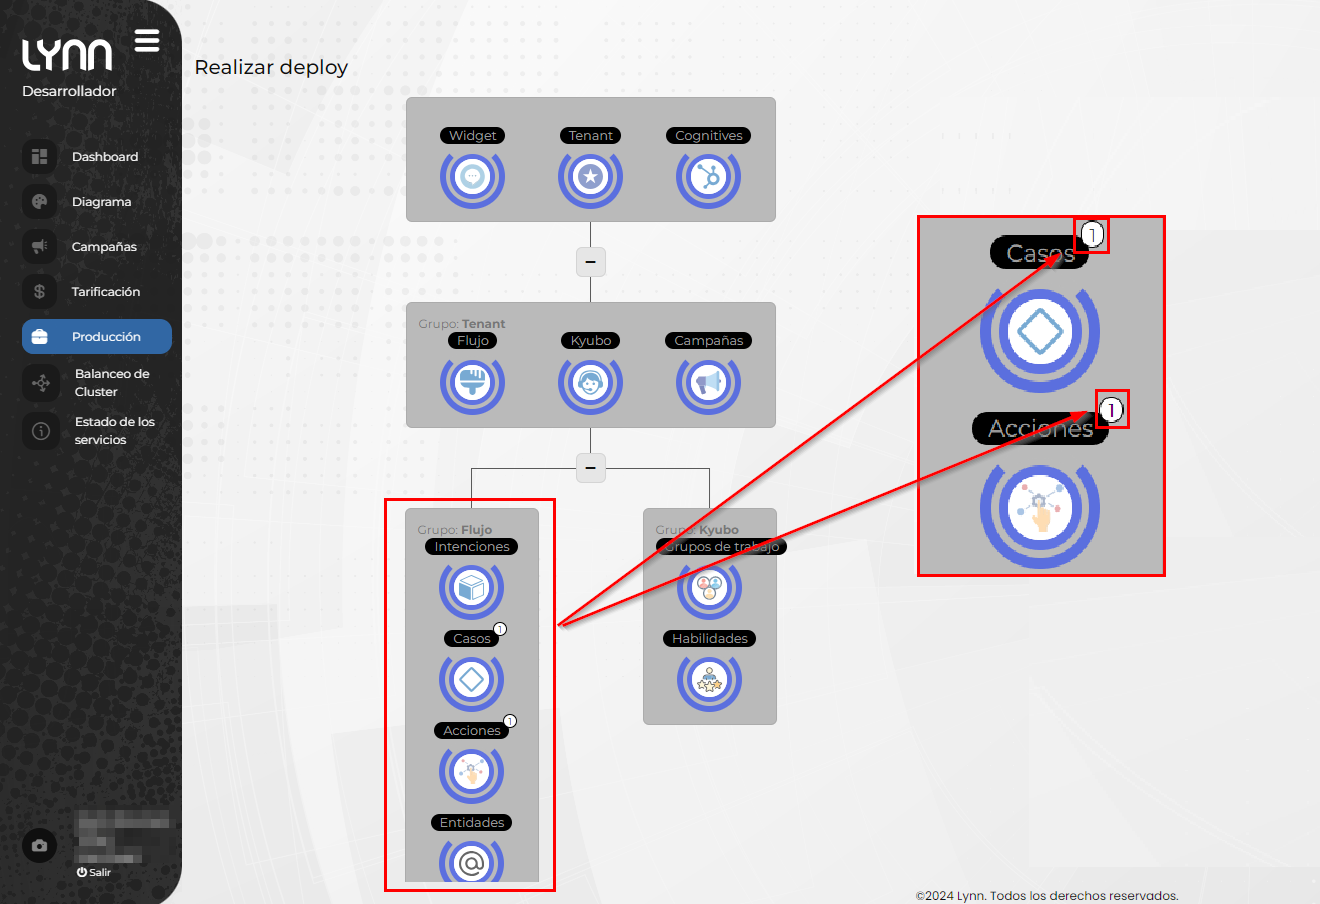
Note: Press the (+) buttons to expand each branch of the organogram or (-) to retract it, as shown in the following image:
Flow Group Deployment
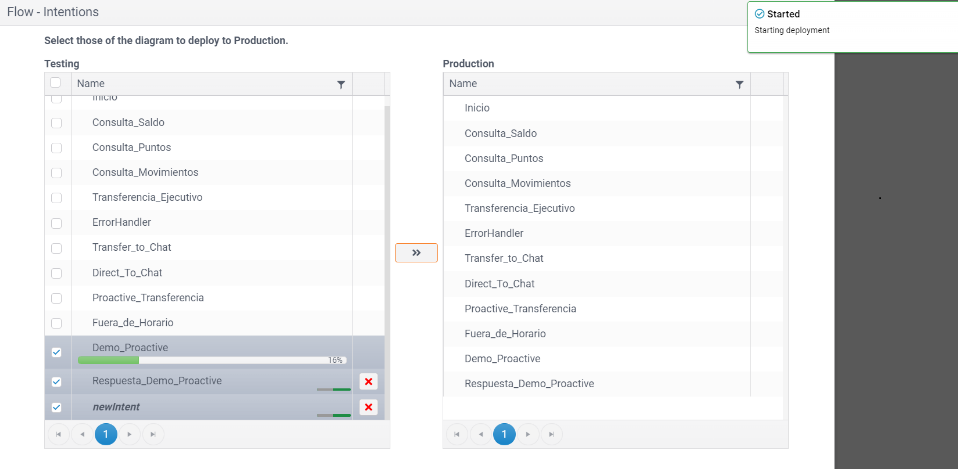
To promote flow elements, select the component of interest and click “Deploy”. As in previous cases, the source table on the left will show the development environment (Testing), and the destination table on the right (Production). Select the elements to promote and wait for the process to complete.
The elements in the table will be promoted one by one. If you try to promote more than one element, the elements in the queue can be canceled with the (X) button. The table will also show elements that have not yet been promoted by highlighting the element's name as shown in the image:
Kyubo Group Deployment
For clients using Kyubo, the option is available to deploy and test certain components (to synchronize environments).
Kyubo deployment includes:
-
Workgroups
-
Skills
-
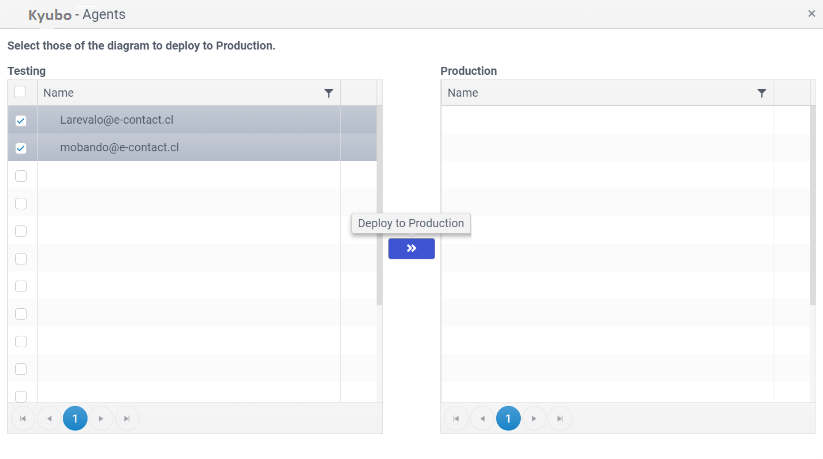
Agents
It is recommended to use this option to promote all available elements in Kyubo of your application. This option allows promoting Skills and Workgroups from Development to Production and vice versa, but it does not allow promoting Agents from production to the development environment.
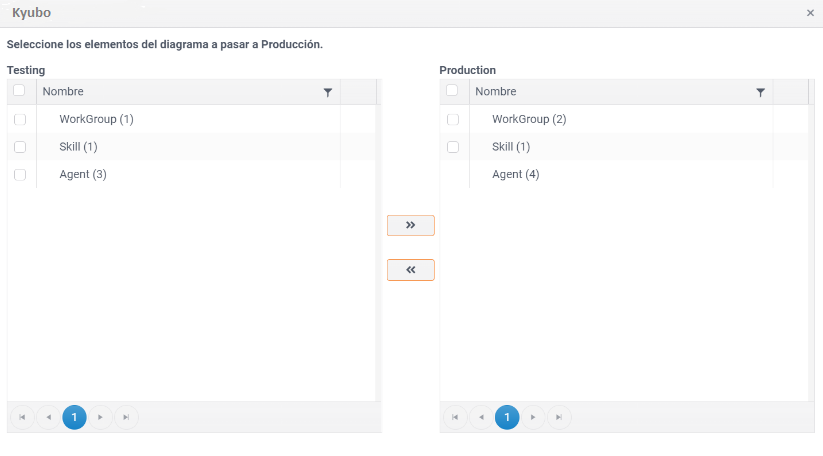
- Workgroups and Skills: Workgroup and skills deployment allows promoting selected components from development to production or from production to development. As in previous examples, you must press the “Deploy to Production” (>>) button, and the element will be seen in the destination table (Production):
Important Note about Deployment from Production: If you are a Kyubo user, from the production environment, you will still have the option to promote workgroups and skills. Other options will be blocked, as shown in the image below.
- Agents: Agents deployment allows promoting selected agents from the development environment to production:
Widget Production Deployment
The configurations of the widget are NOT promoted when a general Tenant production deployment is performed.
These design configurations must be promoted only from this option, which promotes the design configured from your application.
Note: if the associated styles or themes do not update their appearance when implementing a change or moving to production, you can apply the "RefreshCss" instruction, which will force a memory refresh of the associated resources. To do this, append the following slash to the widget URL presented in the embed script: [widgetURL]/RefreshCss

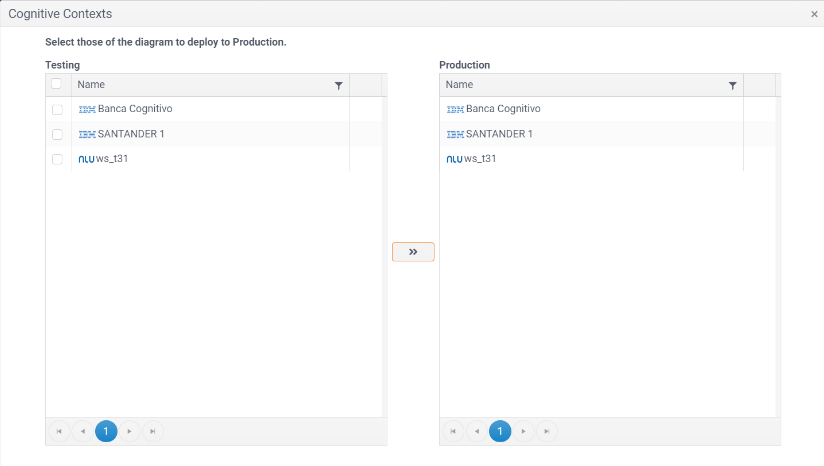
Cognitive Context Production Deployment
This option allows promoting the cognitive contexts configured in your tenant. This option will NOT change your evaluator cognitive context in the production environment. If you need to change or update the default cognitive context, you must go to the target environment and update it in the cognitive context configurator.
Recommendations and Observations of Interest
☑️ Remember that environment actions must be managed by Lynn certificates, and it is strongly advised to carry out validation actions and state backups before environment synchronization activities.
☑️ Changes made in a logical production deployment (PaP) from the environment management tool will take effect for new sessions managed by the messaging module from the end of the synchronization process and will not affect already established sessions.
☑️ Prefer logical PaP during low-traffic windows.
☑️ Remember to update the maintenance window in the application's schedule and avoid coinciding your PaP with this window. If required, inform our support team of this coincidence at least 24 hours in advance.
☑️ Periodically save the state of your application using a snapshot or "state capture". This will be very helpful for the progression and maintenance of your application based on logical flow design activities and configurations on it.
☑️ If your application is not yet available in production, an alert will appear indicating that this will be the first production deployment.
☑️ Perform an integrity validation of the logical flow before deploying a flow or the entire application.
☑️ Widget configurations are not promoted from the PaP application (Tenant) option.
☑️ It is highly recommended to download the Snapshots (State captures) of the development and production environments before performing a PaP. This will allow you to revert your changes if necessary.
☑️ The cognitive context of the development application will NOT be updated in production with this option.
☑️ Channels connected to the target environment are not affected by PaP of the applications.
☑️ Once the application PaP has started, you CANNOT cancel the operation.
☑️ By default, when creating a new application (tenant), only the testing environment will be available. After the first production deployment, the production environment deployment functionality will be activated.
☑️ For clients requiring an additional testing or QA environment, they must request activation through the partner or commercial advisor. This new environment will act as an intermediate environment between testing and production. To see how to perform the PaP from QA environment to production, refer to the section Production Deployment - Application with 3 environments in this same section.
Practical Cases
Next, we will describe how to perform the deployment of commonly used components:
PAP Intents
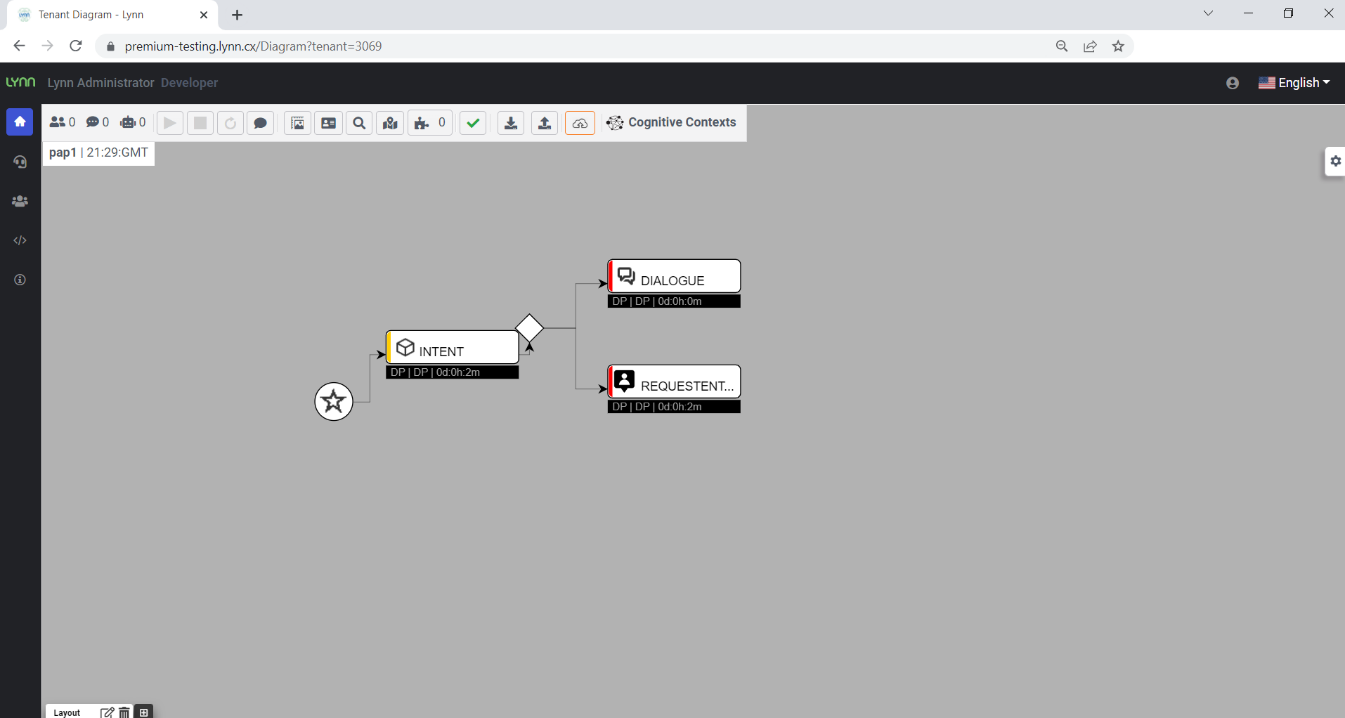
We will analyze a step-by-step production deployment of an intent, which will be associated with a case with two actions: a dialogue and a JavaScript Code Block extension module.
Access the "Production" interface in the development environment, where you should select the intents option within the organigram and follow the instructions described earlier.
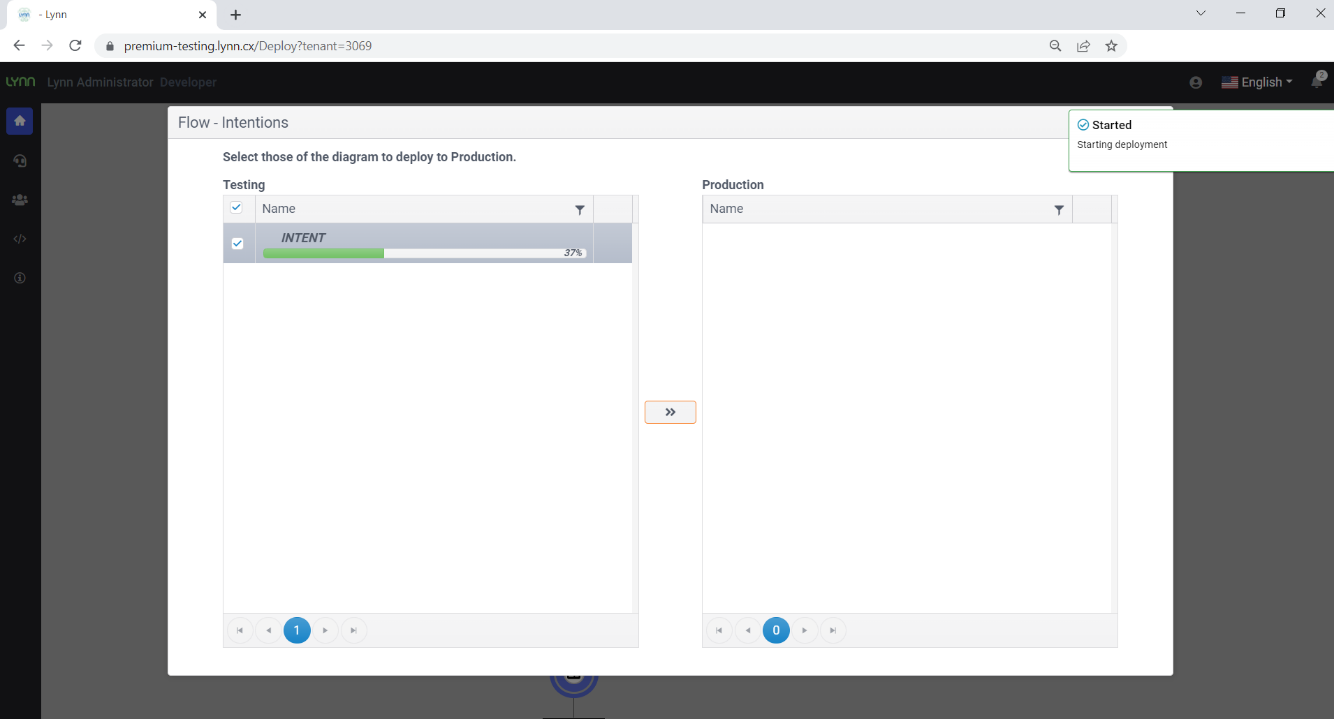
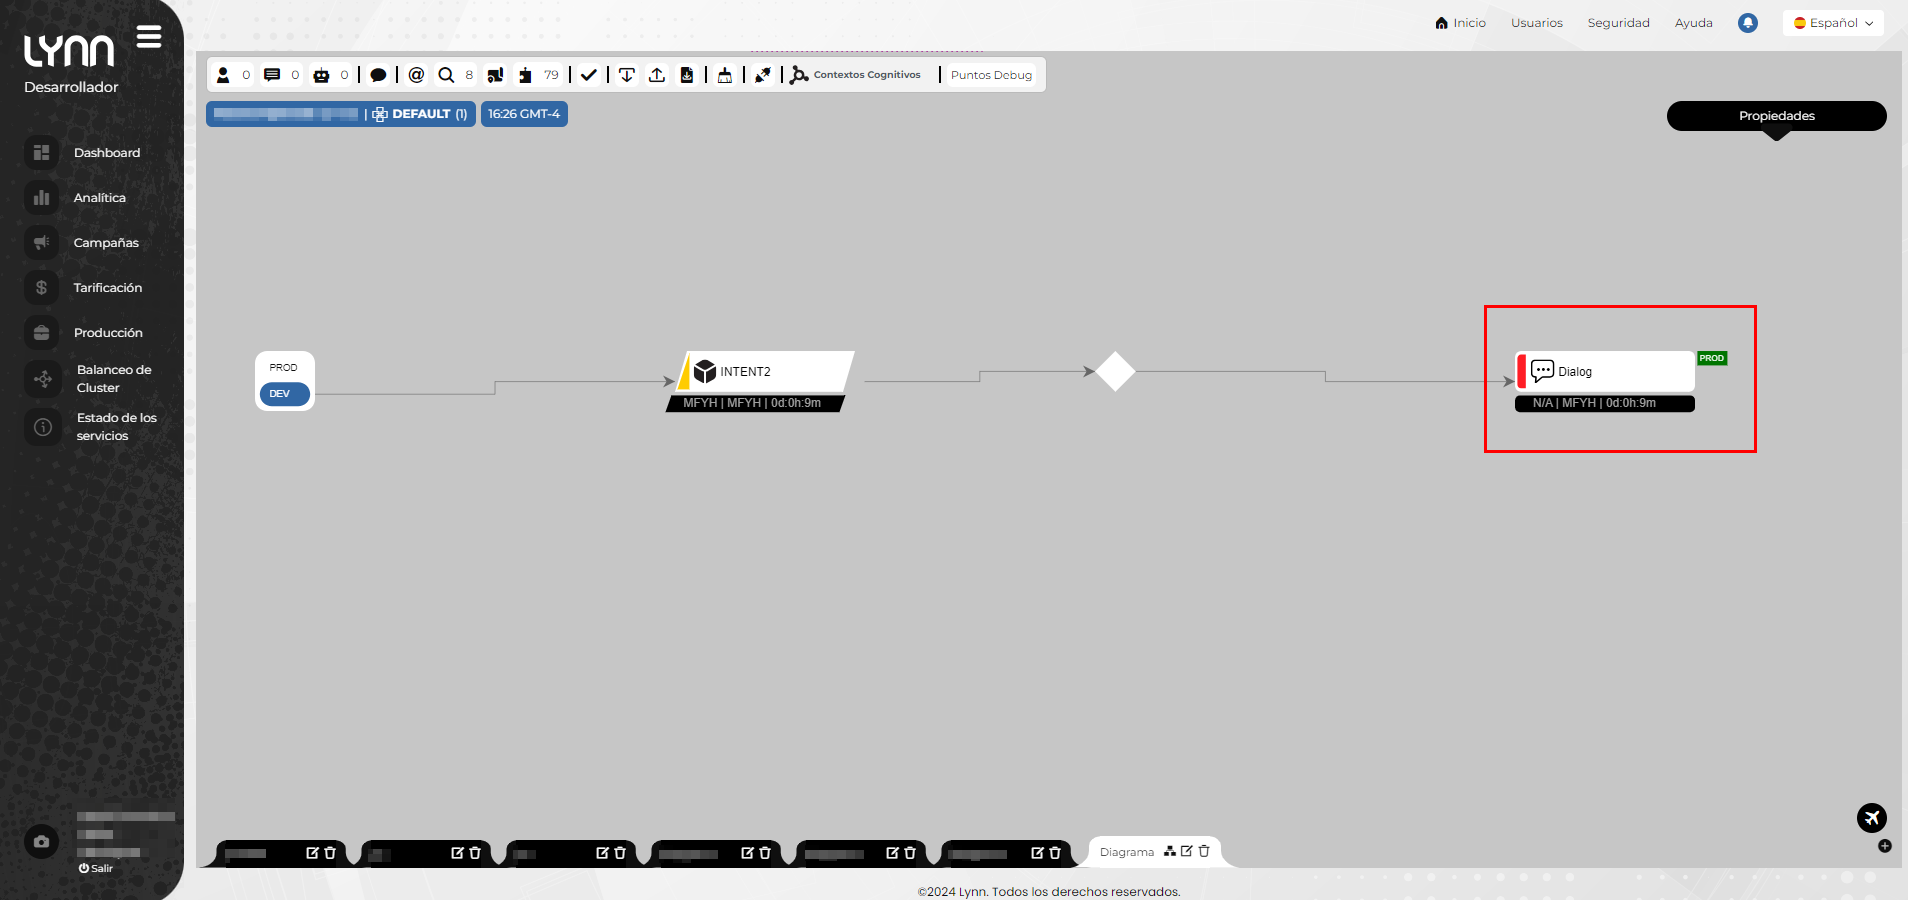
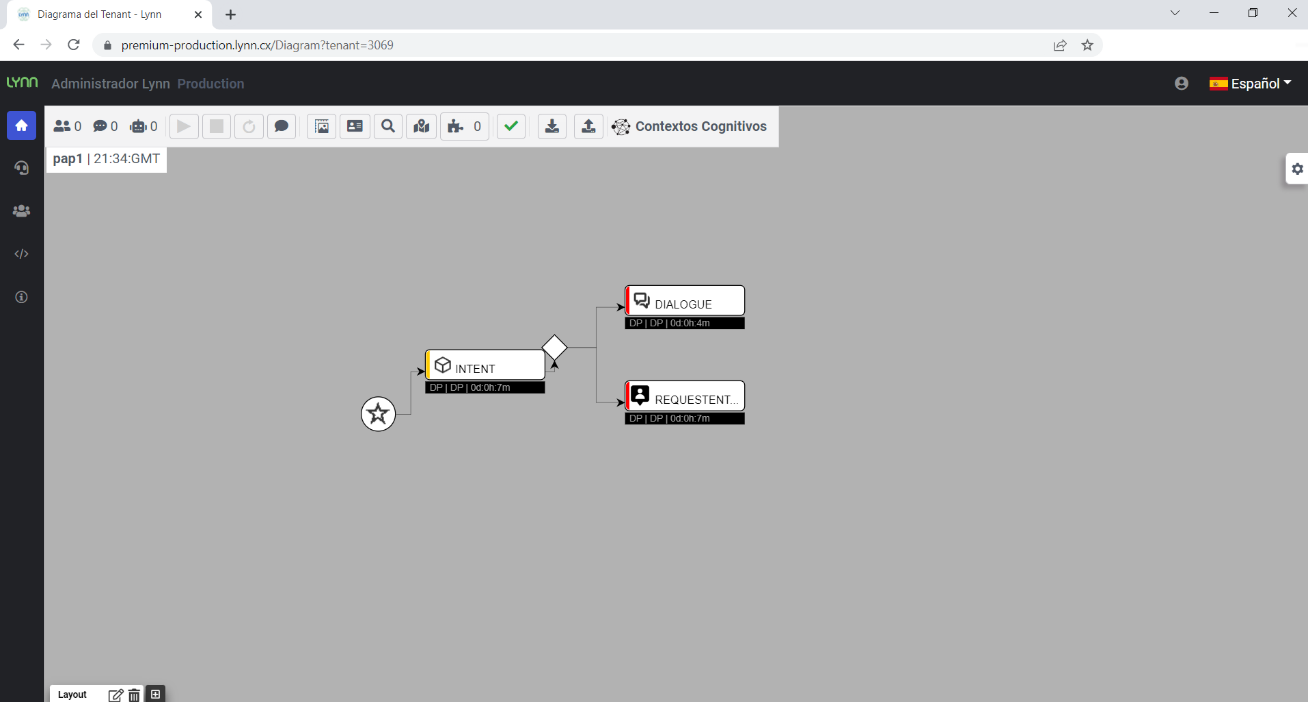
From the result shown below, we can see that, when performing the production deployment of an intent, all its associated connections (case and actions) will also be deployed. In addition, each element will display a label indicating that it is in the production environment.
PAP Actions
In the following case, we will analyze a production deployment corresponding only to a dialogue action, which is associated with a case and an intent.
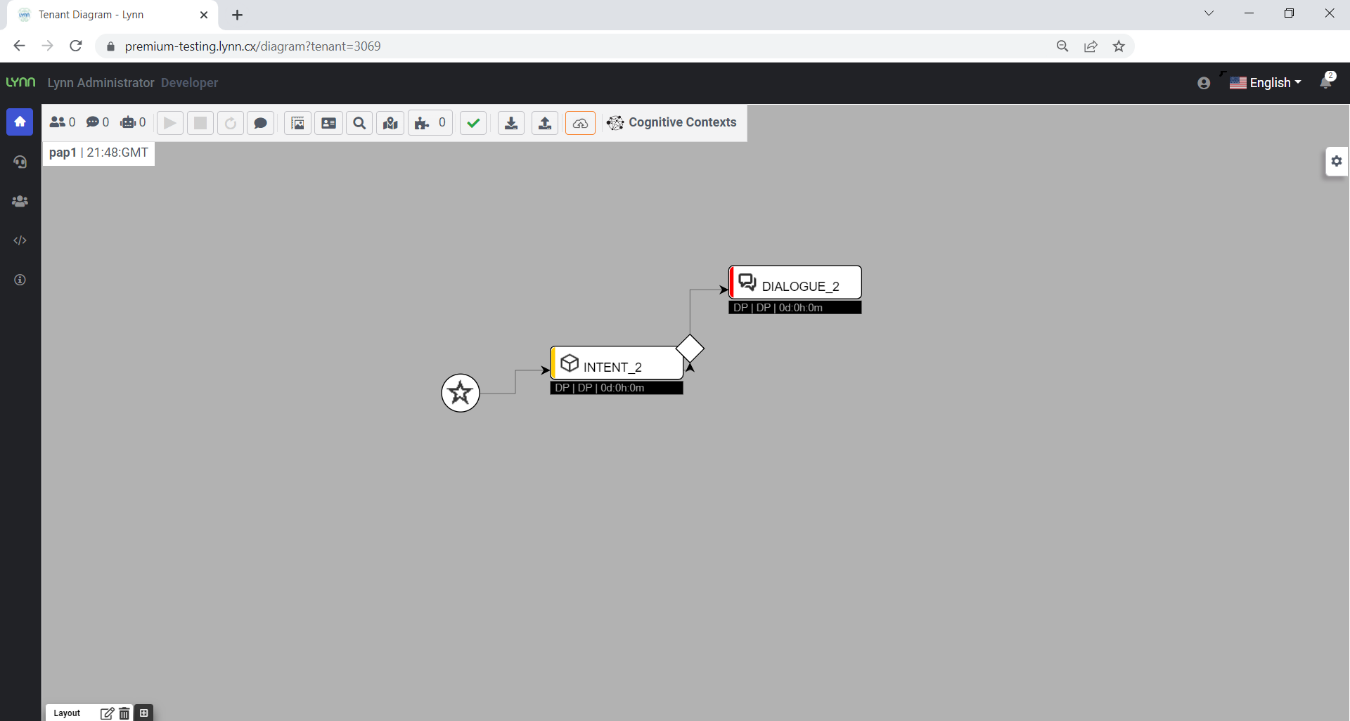
Access the "Production" interface in the development environment to perform the production deployment of the dialogue. Within the organigram, select the actions option and follow the previous instructions to perform the PaP.
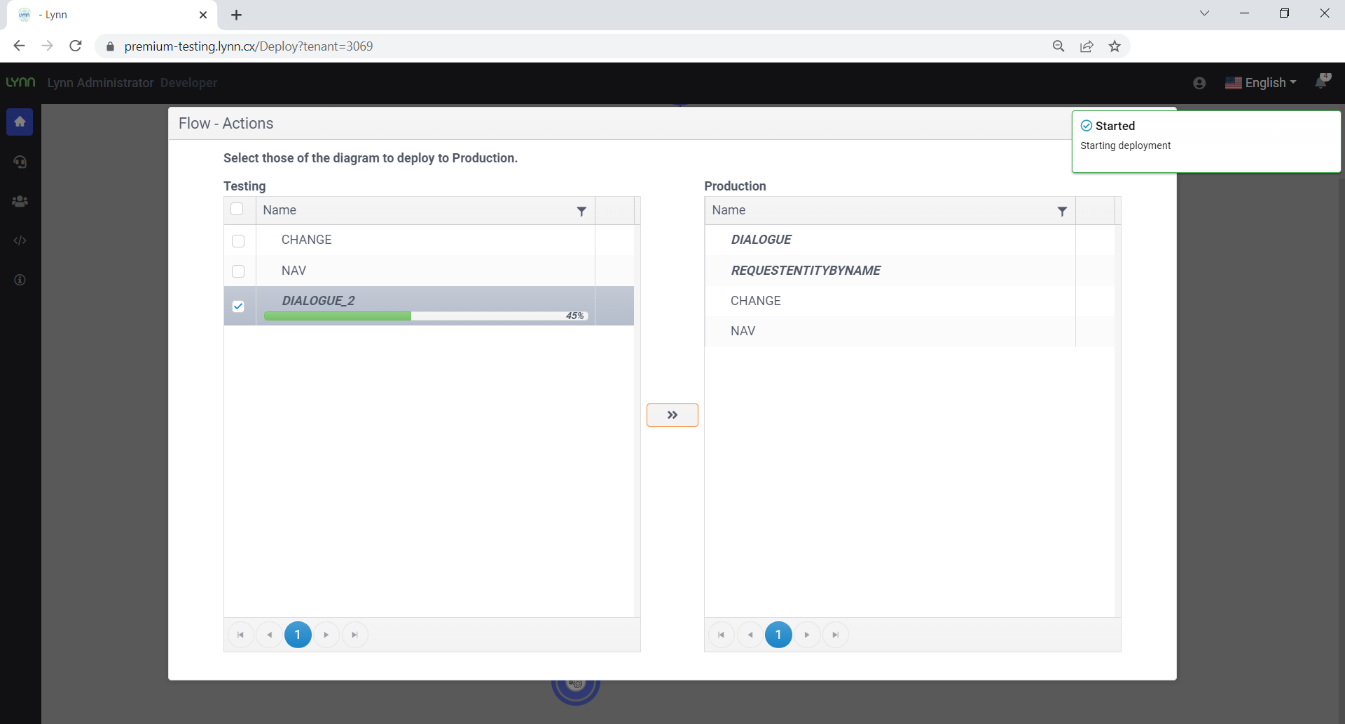
As we can see in the following image, when performing the production deployment of the dialogue, only that action has been deployed. This applies to all actions that you want to move to production.
Important: If you perform the production deployment of an action, the intent and the case will NOT be moved to production.