Manage Black List
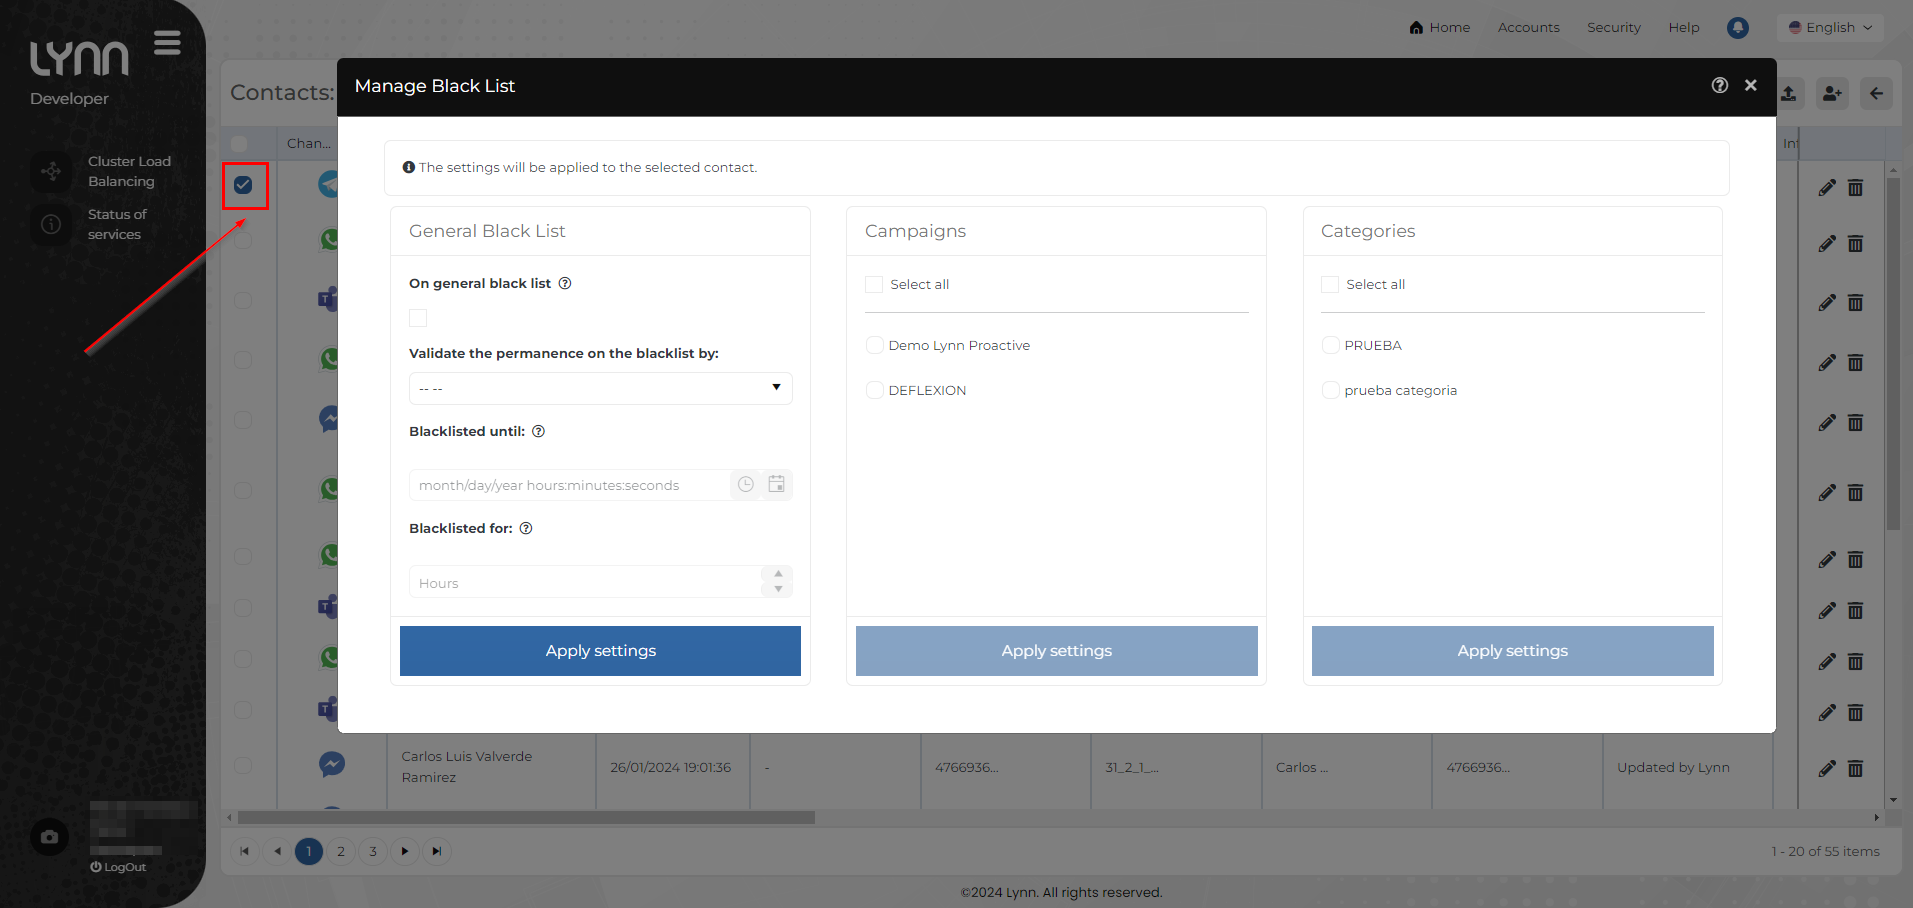
To access this menu, first select a contact. Subsequently, you can add them to the blacklist in a general manner, by campaigns, or by categories.
General Blacklist
In general blacklist: Checkbox that indicates that the selected contact(s) will be added to the general blacklist.
Validate permanence in blacklist by: Dropdown list that allows selecting the action to perform. This can be done as follows:
-
Date: When selecting by date, the option 'In blacklist until' will be enabled, allowing you to choose the date on which the contact will be removed from the blacklist.
Example: 21/02/2024 12:16
-
Hours: When selecting by hours, the option 'In blacklist for' will be enabled, allowing you to choose the number of hours during which the contact will remain in the blacklist, starting from its configuration.
Example: 3
Campaigns
Select all: Check this option to choose all campaigns created for the tenant where you want to include the selected contact in the blacklist.
If you do not want to select all campaigns, you will have the option to view a list of campaigns created in the tenant. This way, you can make individual selections according to your preferences.
Categories
Select all: Check this option to choose all categories created for the tenant where you want to include the selected contact in the blacklist.
If you do not want to select all categories, you will have the option to view a list of categories created in the tenant. This way, you can make individual selections according to your preferences.