Conversation History
A tool that allows users to view existing conversation history based on variables retrieved from the Lynn application. This history can be viewed in real-time or within a defined period of days.
Genesys Cloud Configuration
The executive's script needs to be enhanced with a link that triggers the display of the conversation history in a pop-up window, or the recommended action of displaying it within the same executive script.
Steps:
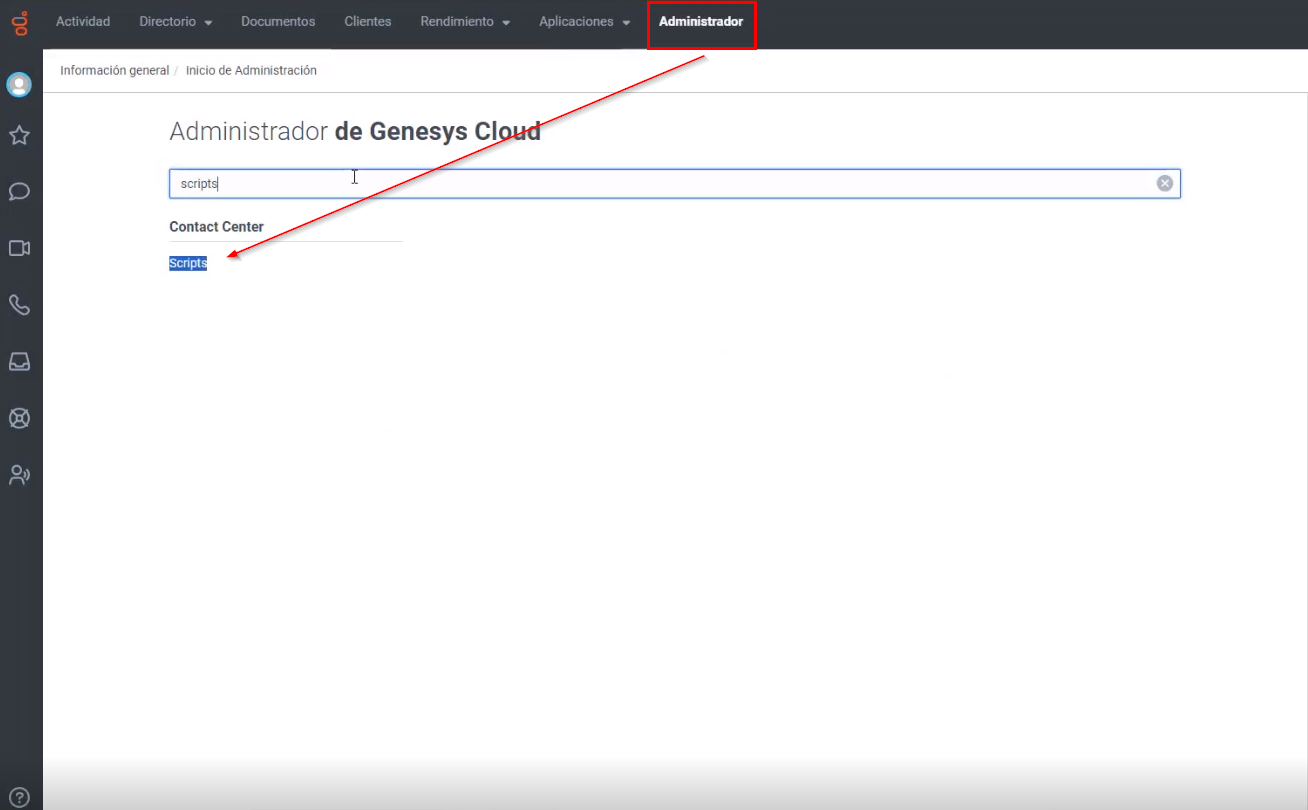
1- Locate Executive Scripts: In Genesys Cloud, find the scripts intended for the executive's use.
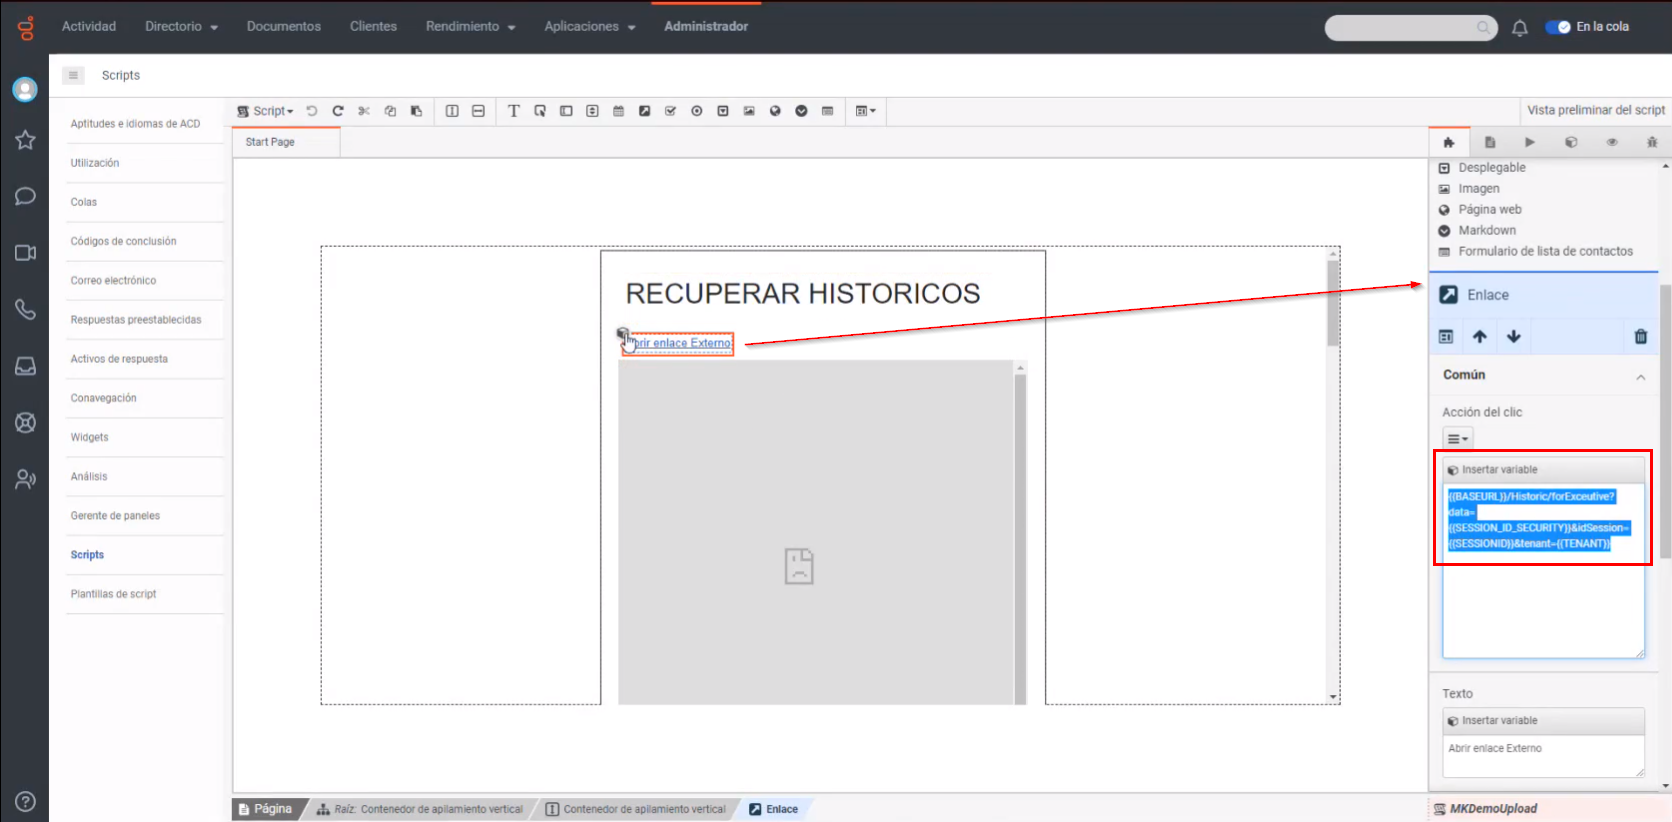
2- Add Link or Web Page Component to View History:
- Link: In the components section, add a component of type web page and associate the web page source with the following URL:
{{BASEURL}}/Historic/forExceutive?data={{SESSION_ID_SECURITY}}&idSession={{SESSIONID}}&tenant={{TENANT}}
- Web Page or iFrame (Recommended): In the components section, add a link component and associate the click action with the following URL:
{{BASEURL}}/Historic/forExceutive?data={{SESSION_ID_SECURITY}}&idSession={{SESSIONID}}&tenant={{TENANT}}
Important Notes:
1.-The variables within the URL (BASEURL, SESSION_ID_SECURITY, SESSIONID, TENANT) must be declared in the script's variable section.
2.-Use https://premium-testing.lynn.cx/ as BASEURL for the testing environment. For production, consult the Lynn team.
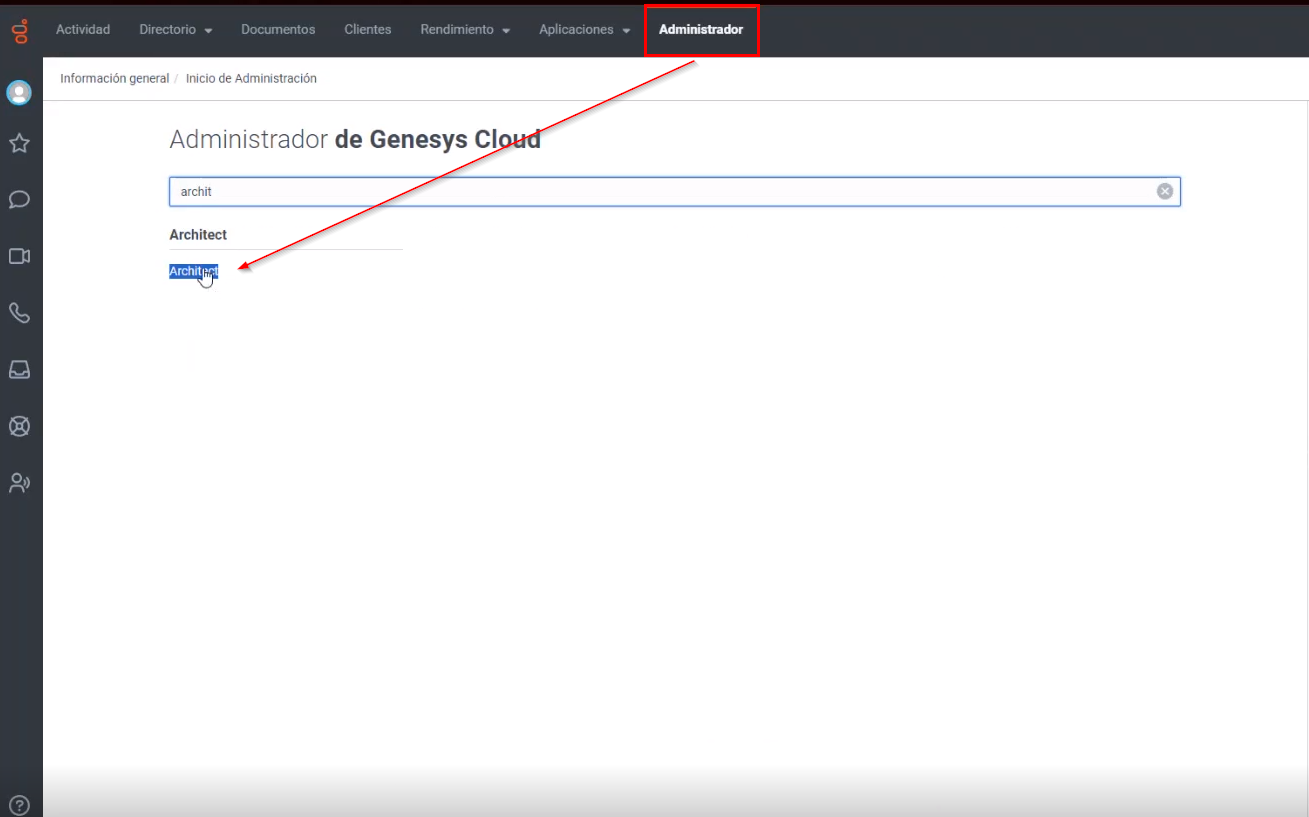
3- Associate Script with an Architect Flow: Go to the architect section in Genesys Cloud and associate the script with a flow.
4- Within the architect, it is necessary to create a flow with the following components:
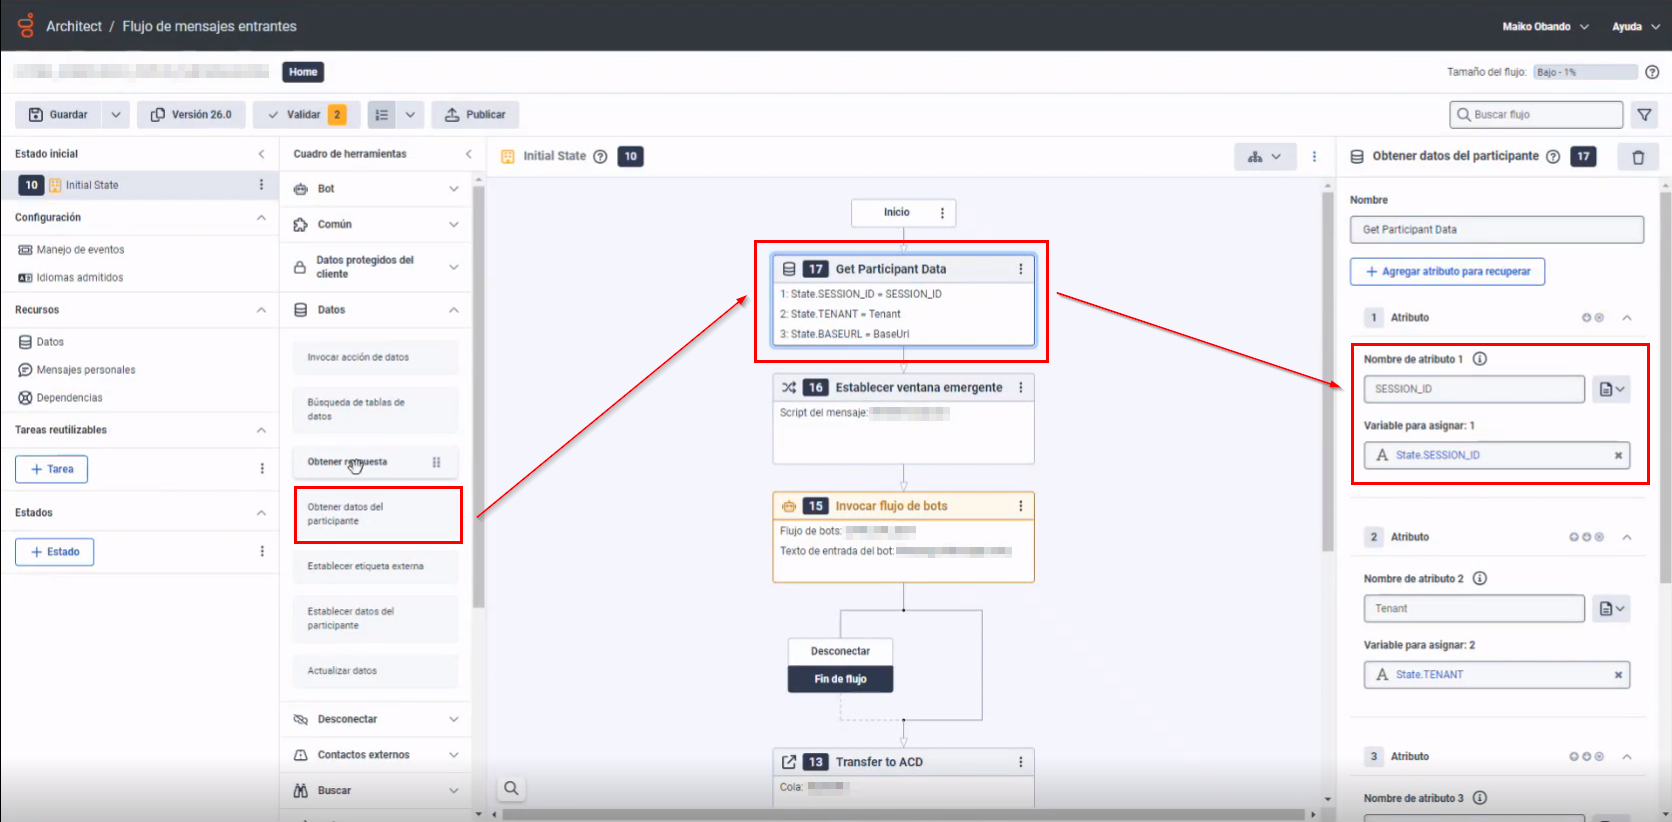
- Insert Participant Data (GetParticipantData):
In this process, enter the attribute name, which will be the name of the variable as received from the Lynn application. Also, in the "variable to assign" field, enter the name with which the value will be internally assigned. This refers to the parameter of the URL mentioned earlier.
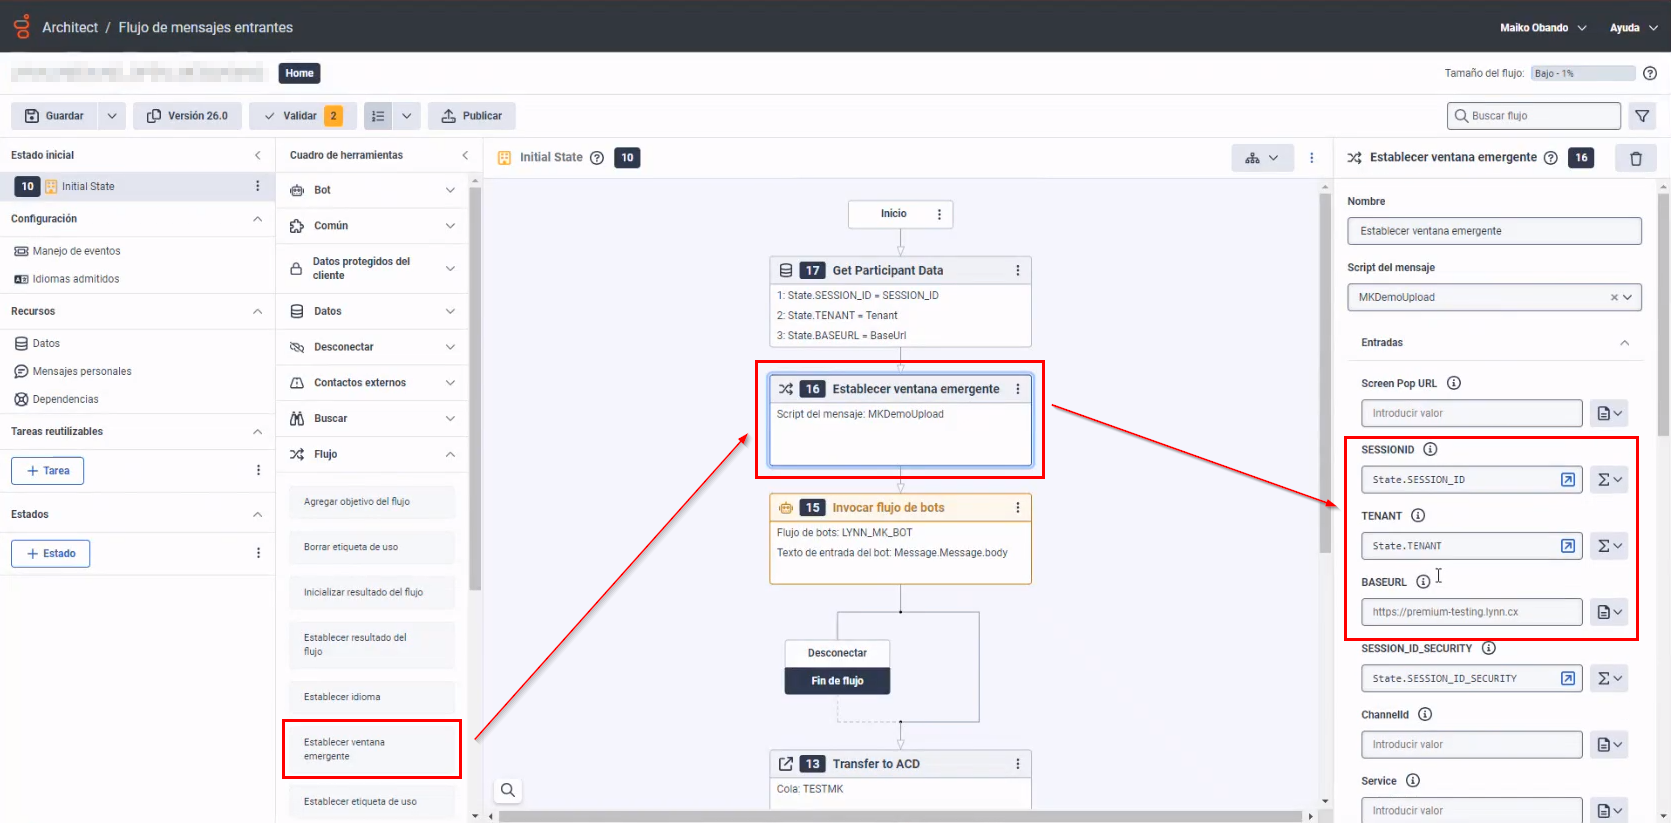
- Set pop-up windows:
In the fields of this configuration, enter the variables that were defined in the previous step.
Note: Once this configuration is completed, don't forget to publish the script in Genesys Cloud so that these fields can be viewed.
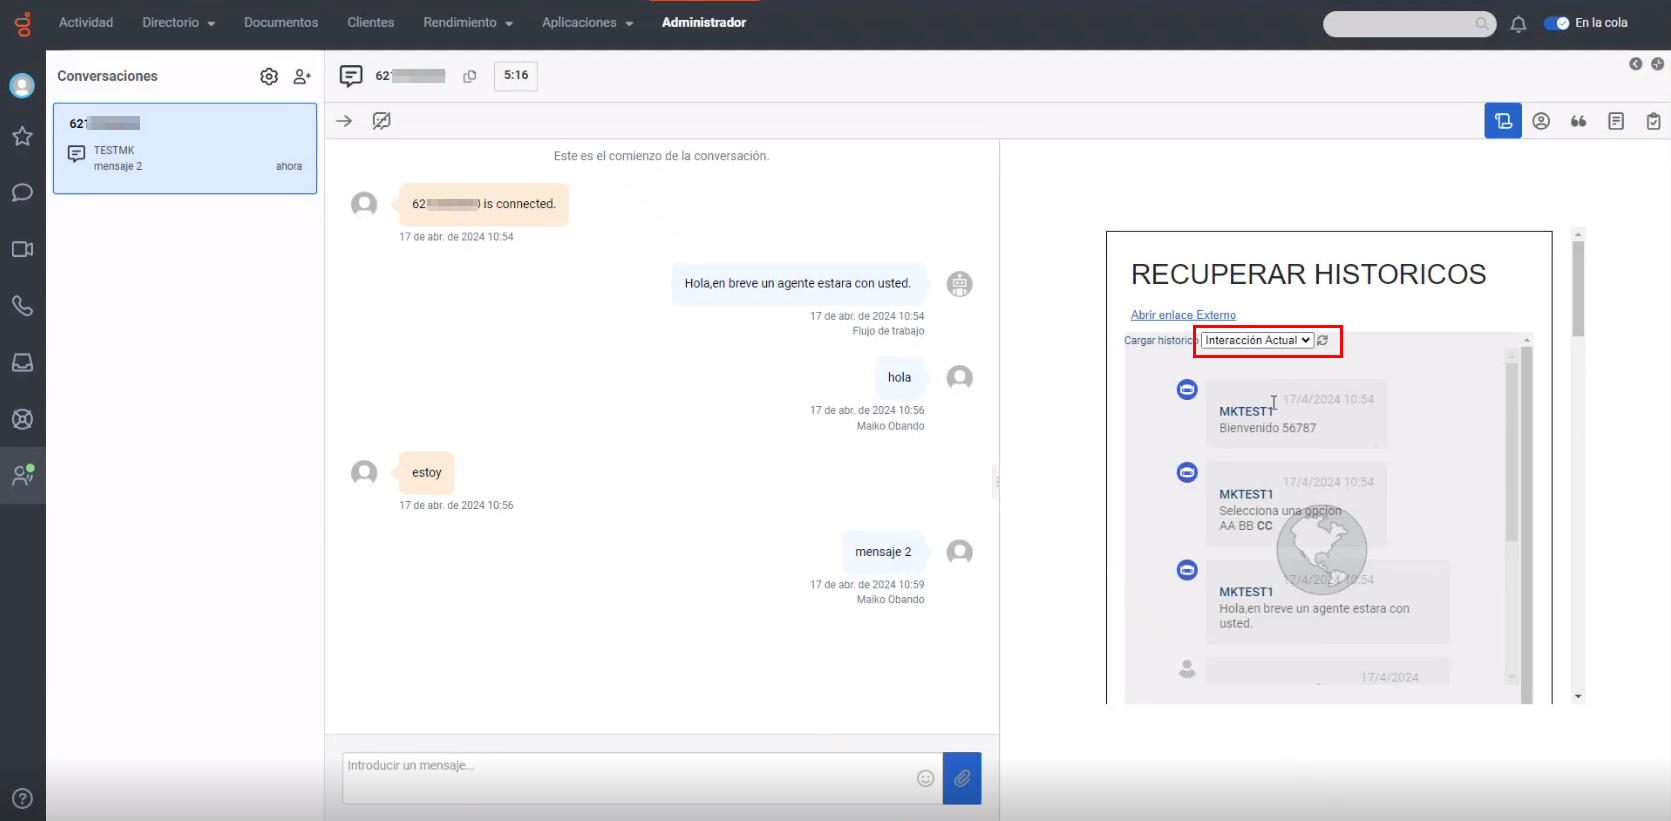
Upon completing these configurations, the user will be able to access the conversation history, where they can select the time period they wish to view this information, through the drop-down list called "Load history."