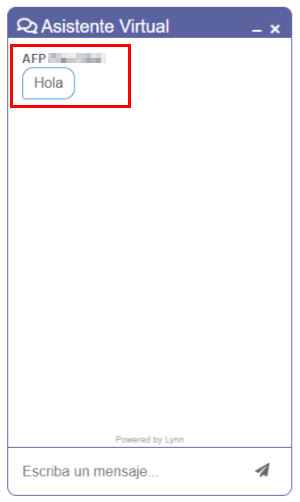
Web Chat
Web Chat Channel Configuration
Create Web Chat Channel
To carry out this procedure, the user needs to access the flow designer and right-click, where the option to configure the channel will be displayed. Next, select the "Add channel to developer" option, which will open the following window:
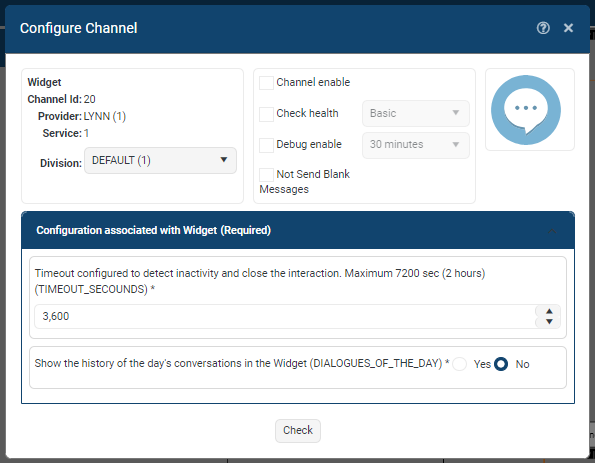
During this process, it is essential to define the configured waiting time to detect inactivity and close the interaction. In this case, the maximum limit is 7200 seconds (2 hours) (TIMEOUT_SECONDS). Additionally, choose the option to display historical conversations of the day in the widget (DIALOGUES_OF_THE_DAY).
Widget Designer (Web Chat Appearance)
The widget designer is a functionality that allows creating graphic design themes that adapt to the look & feel of the client's website.
Here several themes can be created and the default theme with which the widget will be presented to the client's website will be selected.
This designer will present several sections depending on the level of expertise in web design. It can be personalized at a general level, header, footer, button, chat, form and advanced where CSS can be used.
If you want to use the widget in a development environment, consult the section Sandbox.
Architecture
The channel is configured in the tenant diagram, from where you can go to the theme configuration, and finally, it is included on the client's page for deployment.

Themes

Themes are different designs in which the widget will be presented on the client's website. You can create as many themes as desired, and the theme that will be displayed is the one selected as the default.
You can give a name and description to identify the type of theme designed.
Configuration
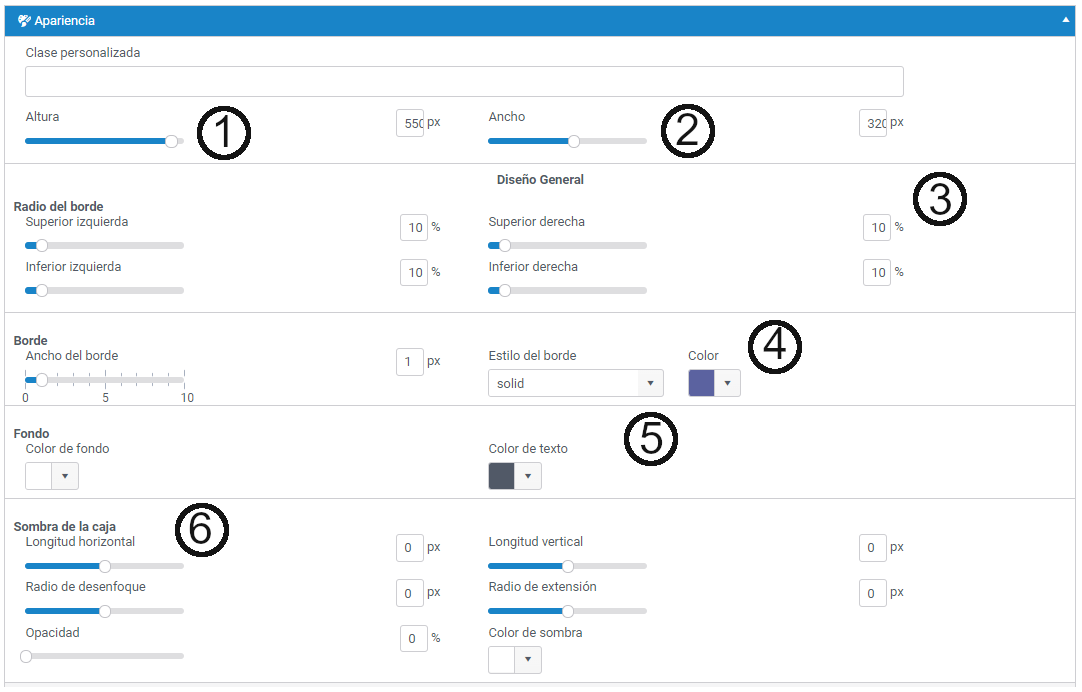
General Appearance Section
Here, you can configure different elements of the widget's general design.
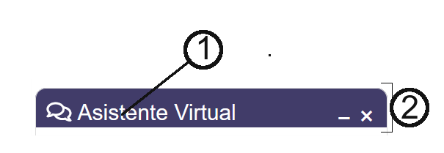
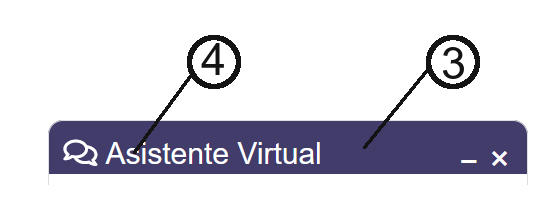
Header Section
Here, you can configure different elements of the widget's header design.

Footer Section
This section is optional and is configured in case there are frequently asked questions or security information


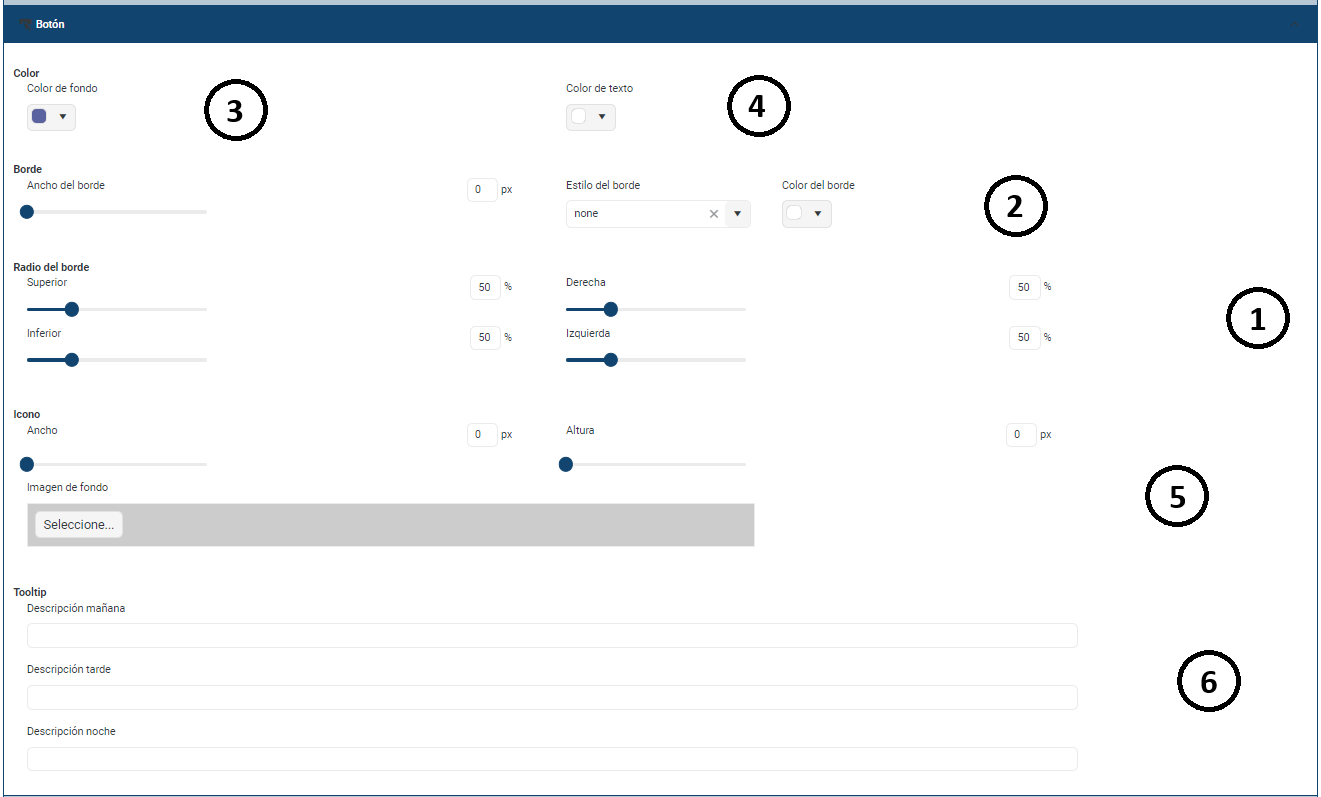
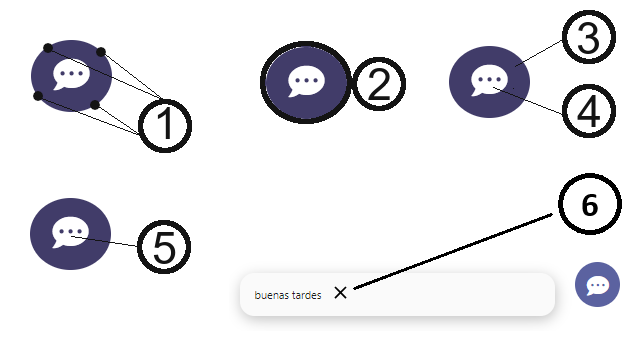
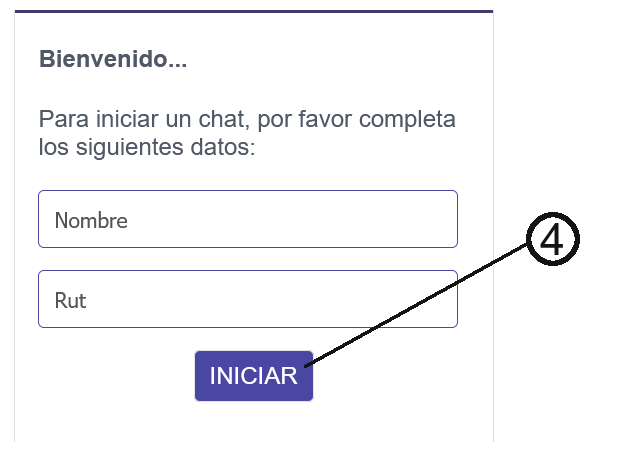
Button Section
In this section, you can configure the graphical elements of the button that will open the widget, whether it's presenting the form or presenting the chat with which the user will interact with Lynn, creating an interaction.
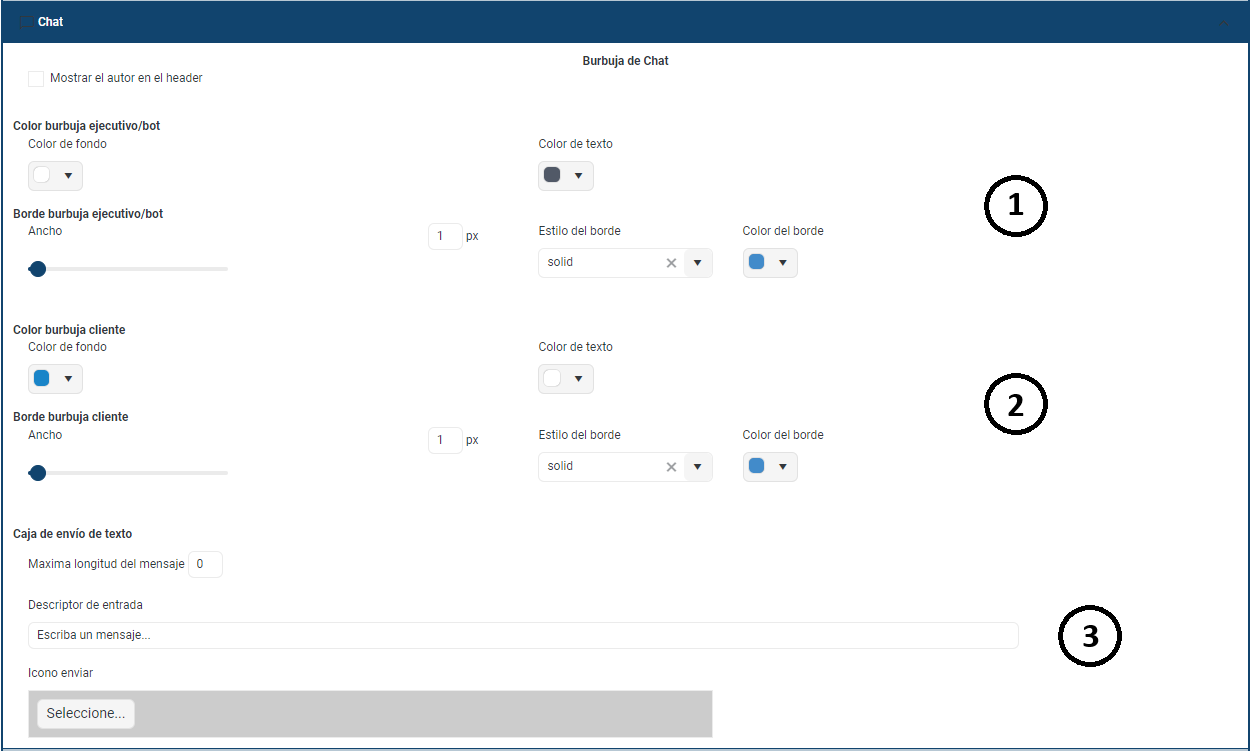
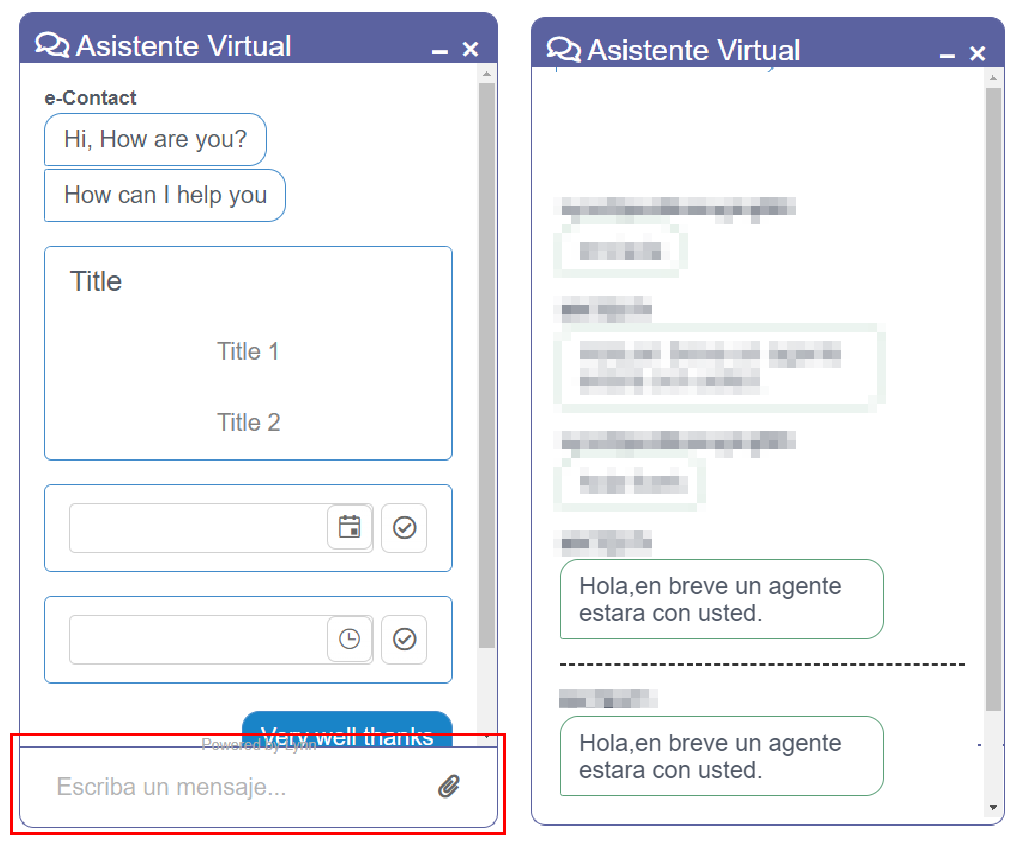
Chat Section
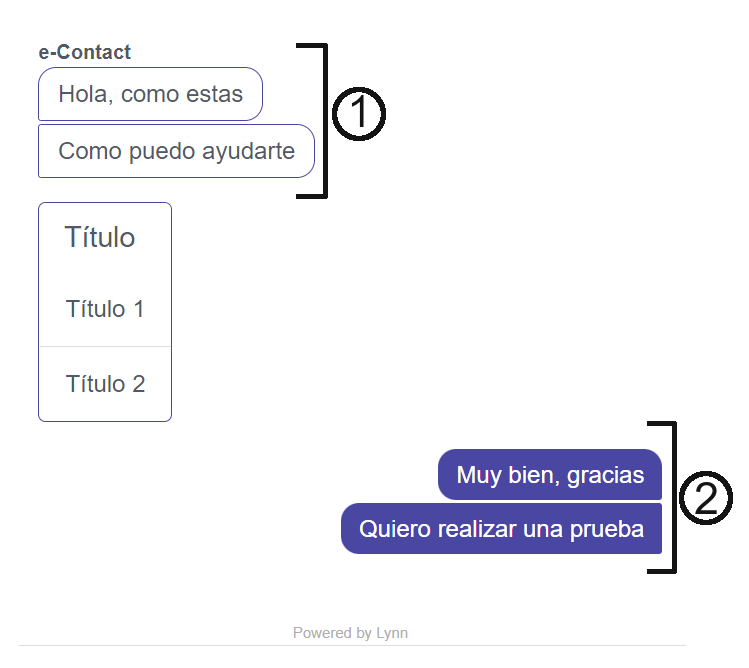
Here, you define the graphical elements that compose the chat in the widget, such as the bubbles for the bot or executive (left) and the bubbles for the client (right).
You can also configure the menus in a general manner, according to the executive's bubble configuration.
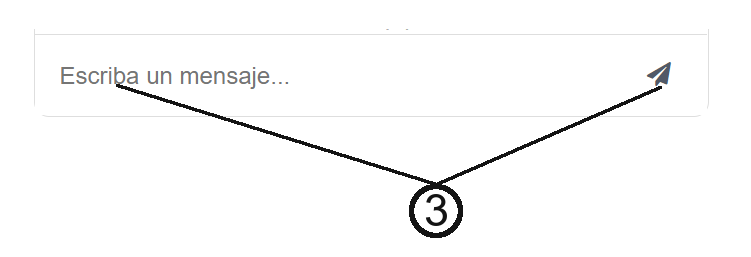
You can also adjust the text input box.
The bot's box will display the description, which is the name defined for the tenant.
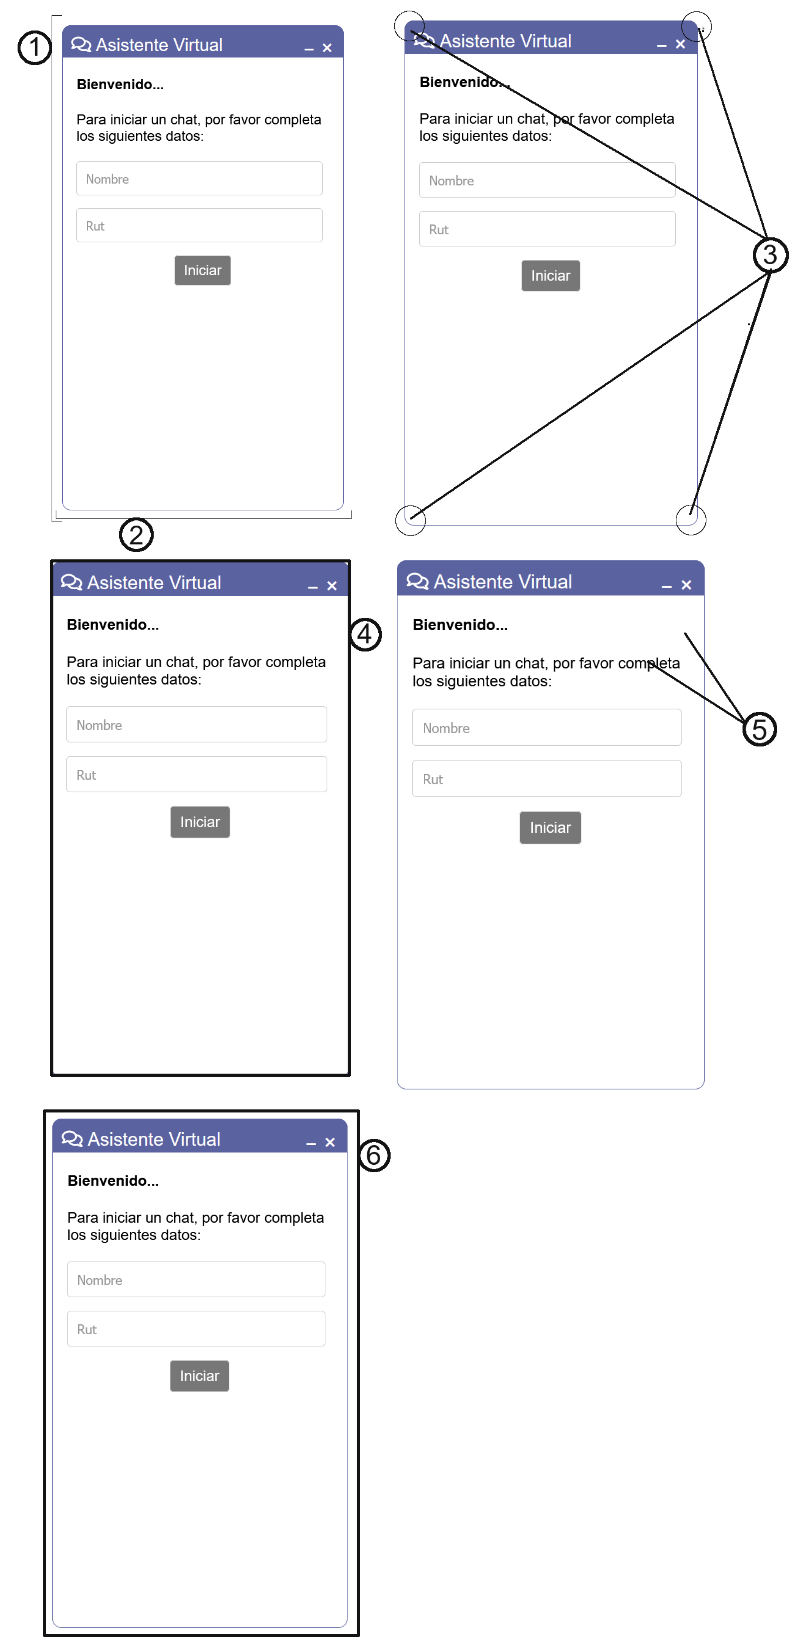
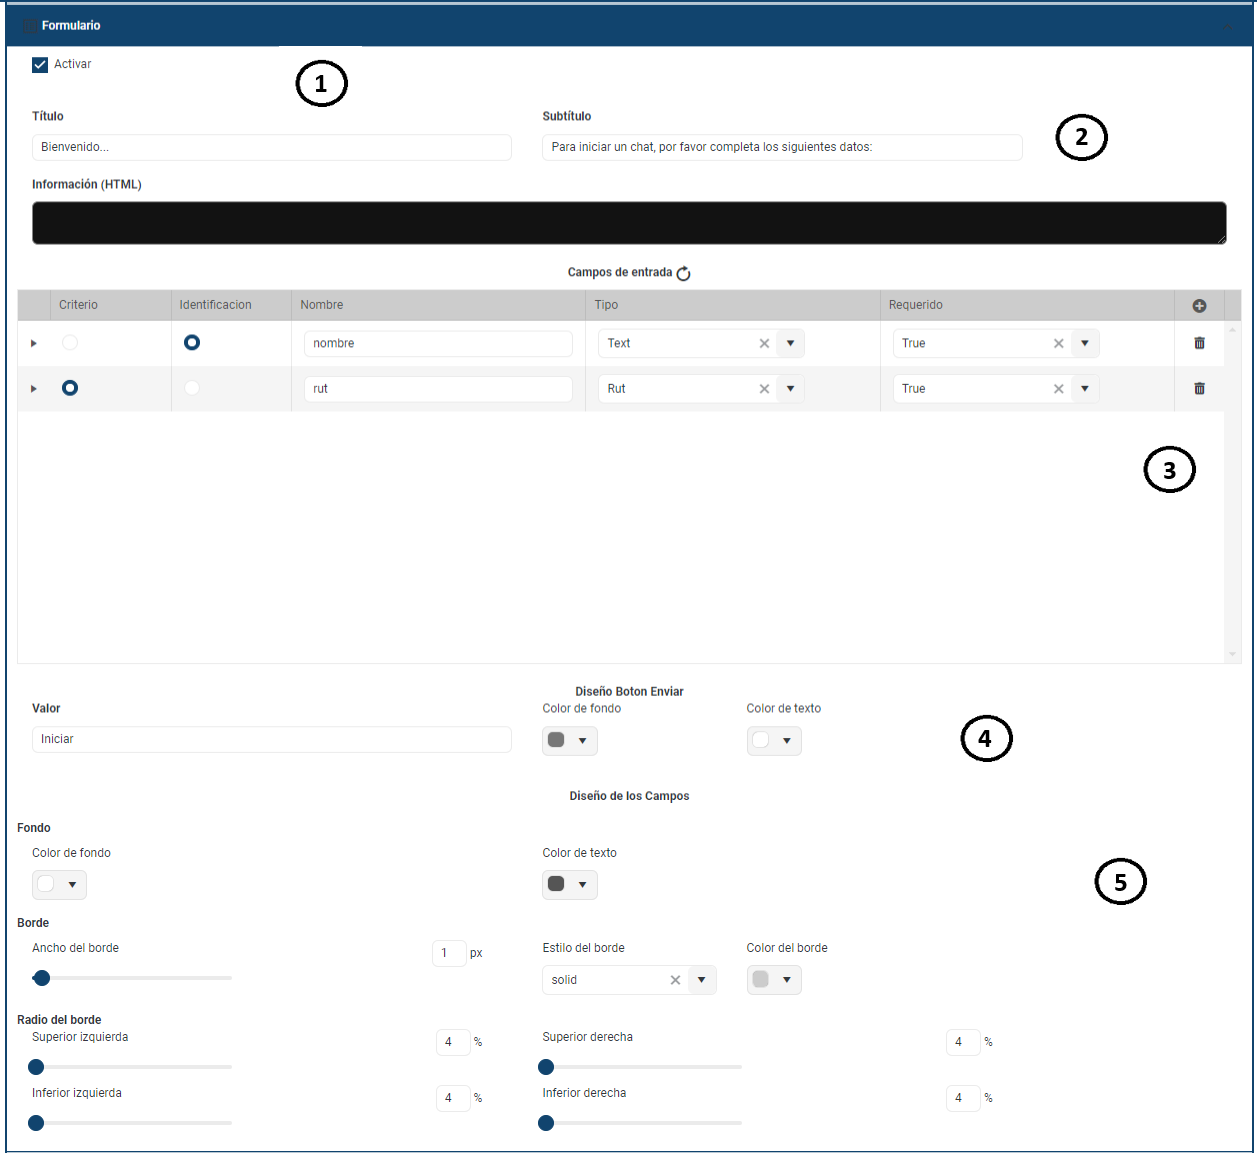
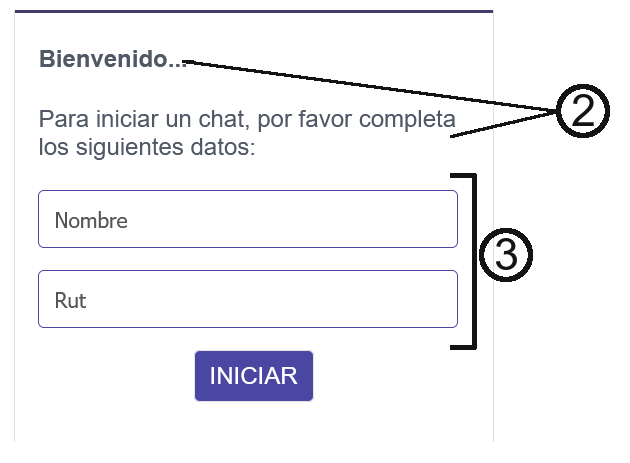
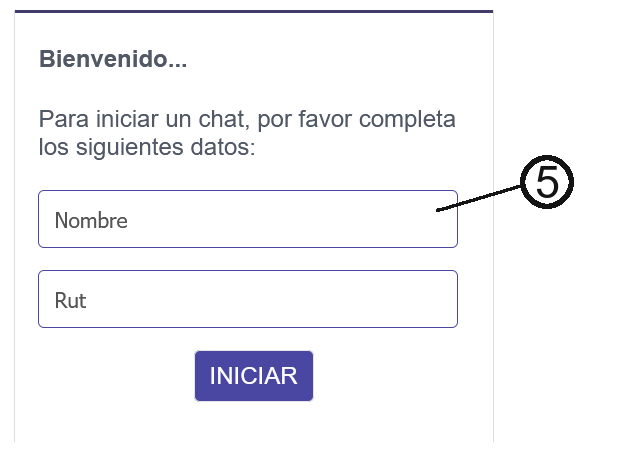
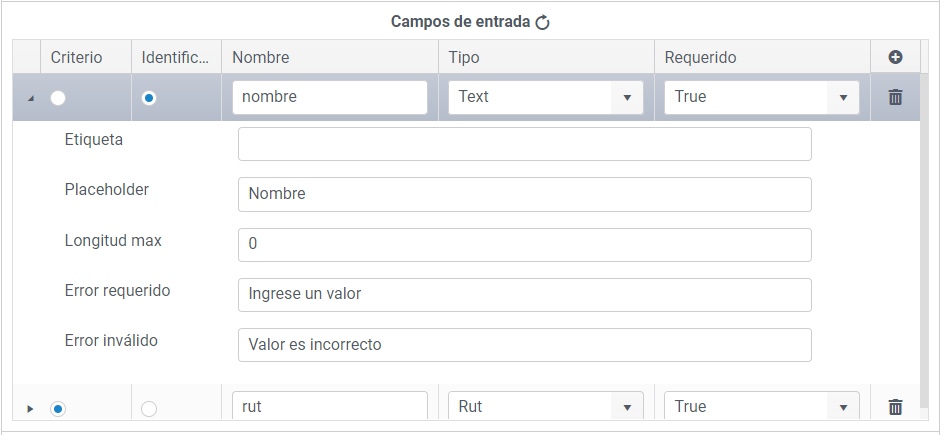
Form Section
If the form is active, a form will be presented to the widget user where corresponding data will be requested:
Criterio: User identification value, such as ID, phone number, email, etc.
Identificación: It is the way the user will identify themselves to Lynn or the executive. Usually, it is the person's name.
You can also add all the necessary fields according to the client's needs.
The information sent through the form is considered as "User Data" or user interaction information.
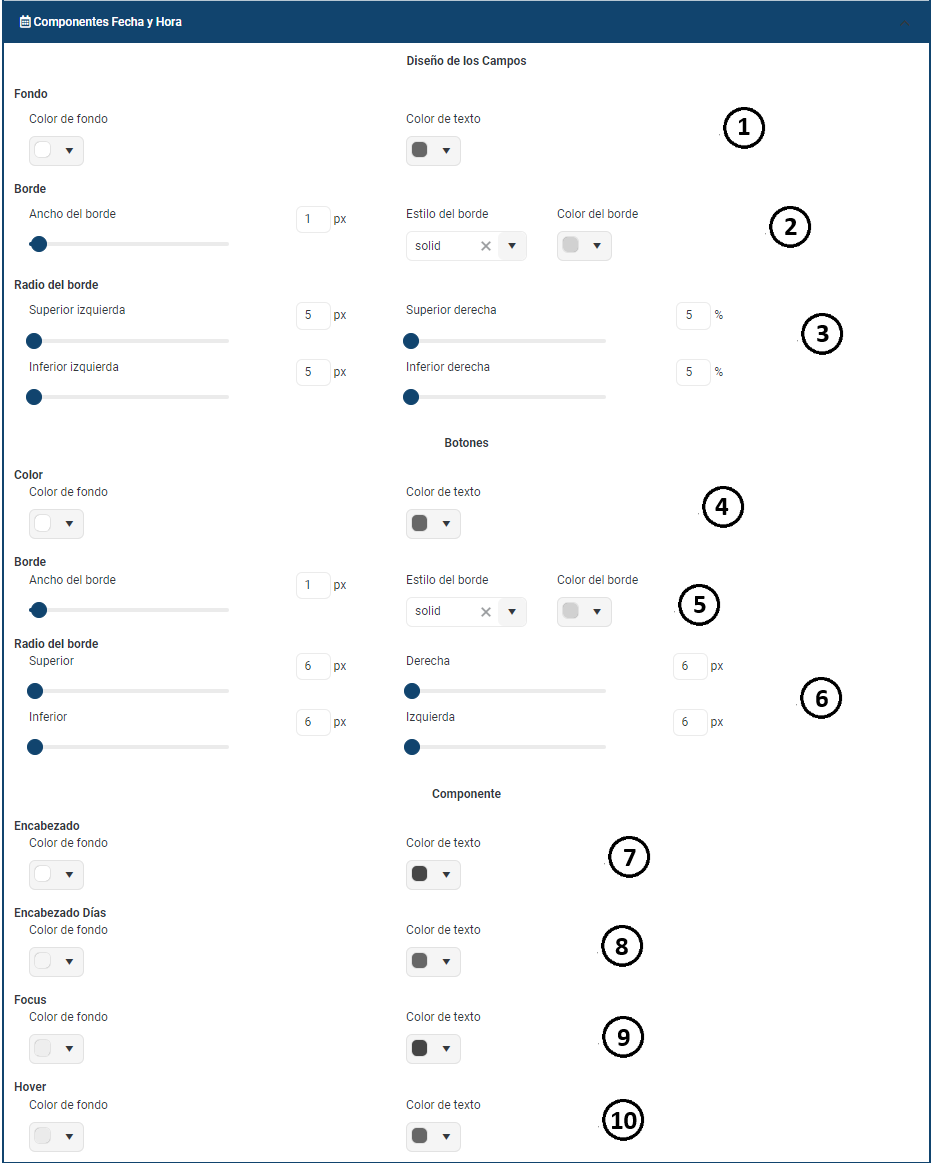
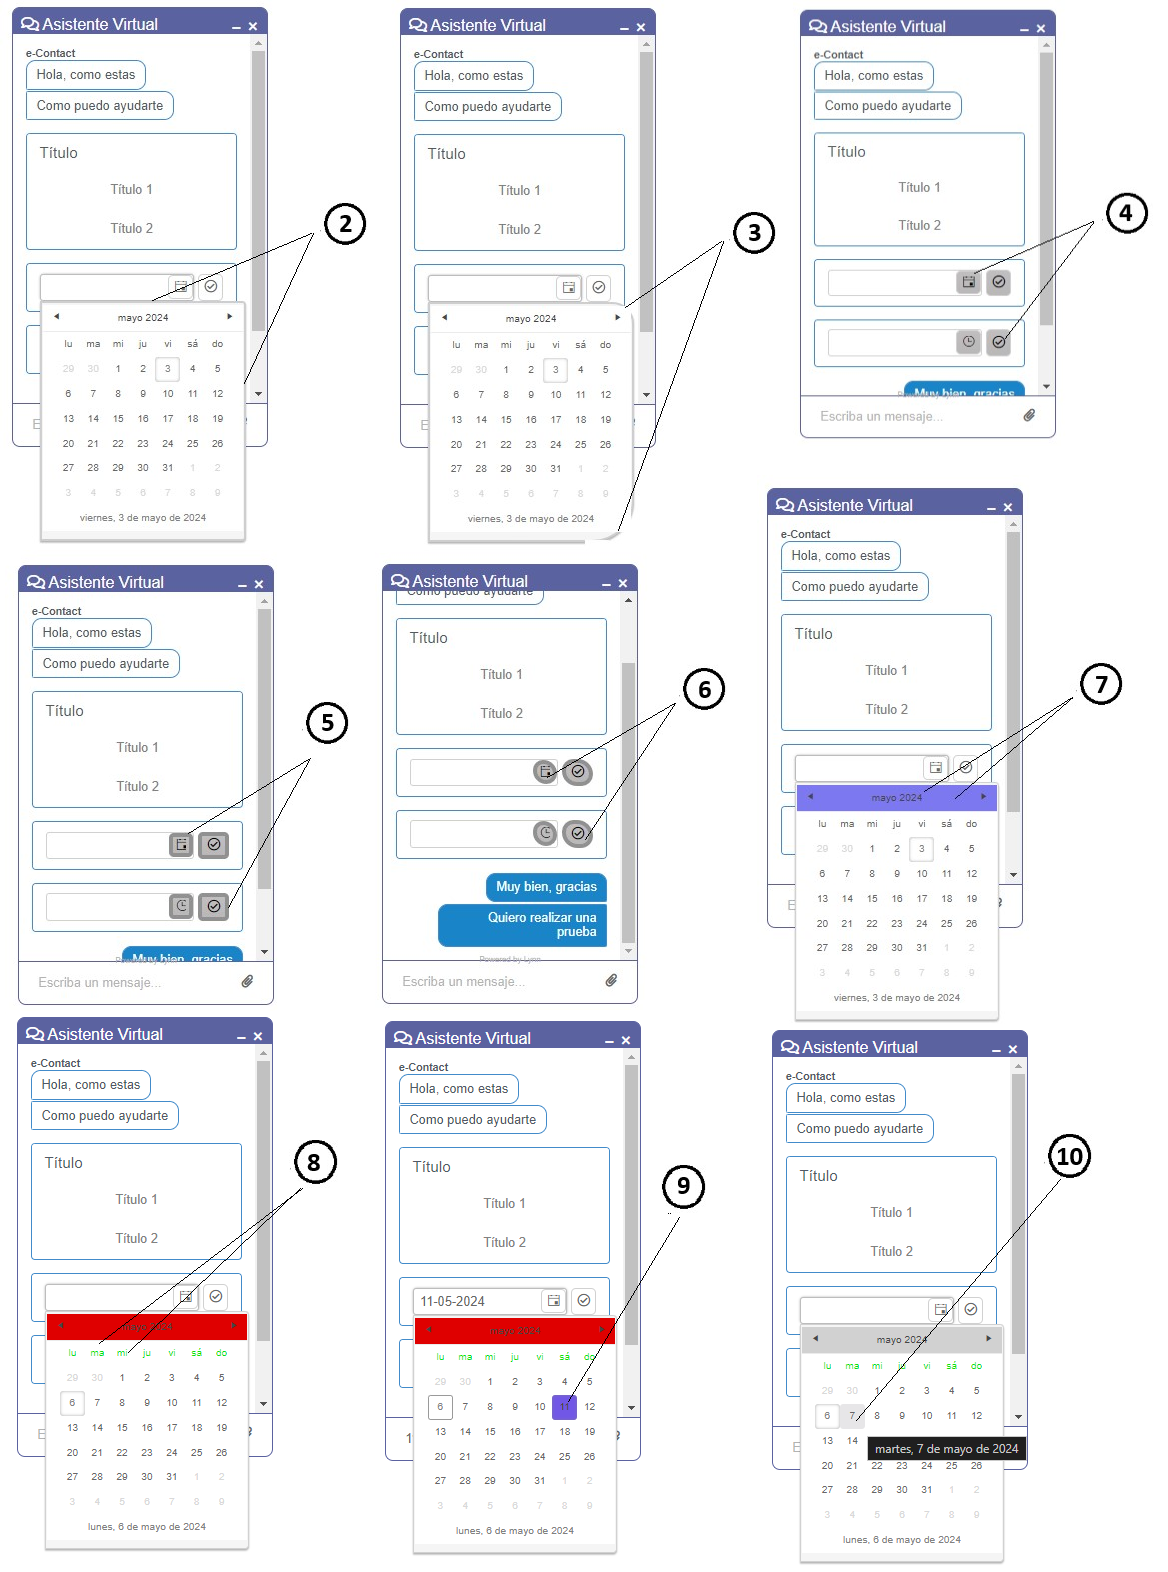
Date and Time Components Section
In this section, adjustments can be made to the date and time components, such as changes in background color, font type, button design for accessing these properties, among others.
Remember Session Data Section
The "Remember Session Data" feature provides the ability to keep the session active while the user navigates between different pages, regardless of whether they remain on the same page or switch to another.
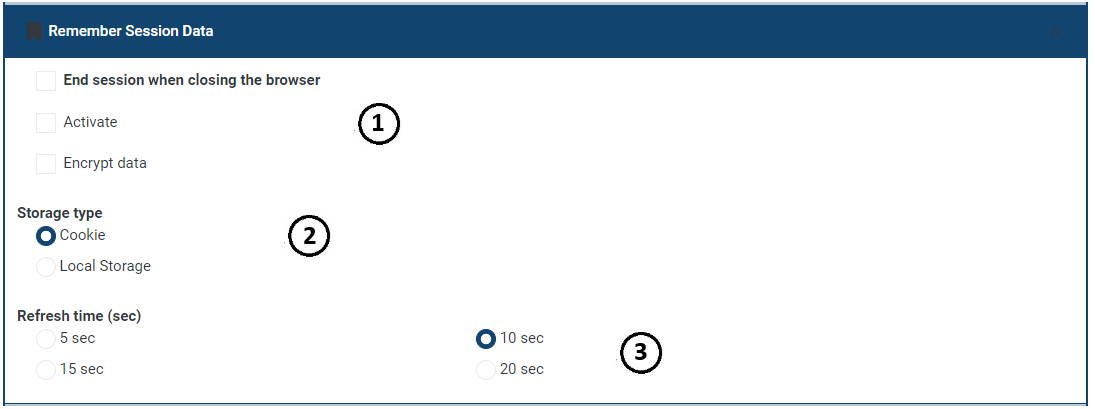
1. Features
- End Session on Browser Close: Automatically closes the session when the browser tab is closed.
- Activate: Allows remembering the session between pages within the client's site.
- Encrypt Data: Encrypts session data in the browser's storage for enhanced security.
2. Storage Type
This feature enables storing session information either as cookies or in the browser's local storage.
3. Refresh Time (sec)
The duration for which the session or stored information remains active can be configured.
Events Section
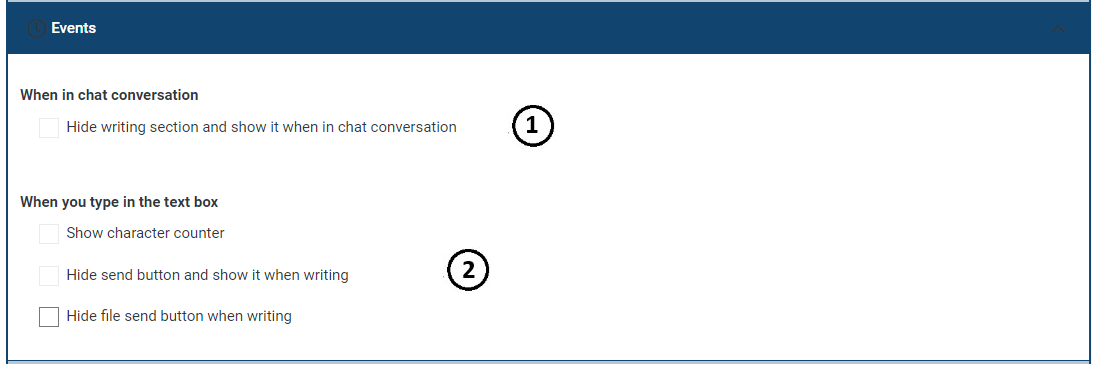
1. When in Chat Conversation:
This field allows the user to solely view and access the chat typing area when interaction is requested by them. For example, the chat prompts for entering the Rut or name.
2. When Typing in the Text Box:
Show Character Counter: This field, when selected, displays the number of characters entered. To indicate the corresponding limit, it must be configured in the Maximum Message Length parameter, located in the text input box section within the chat.

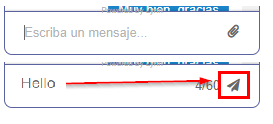
Hide Send Button and Show When Typing: When selected, this field displays the message send button only when text is entered in the text box.
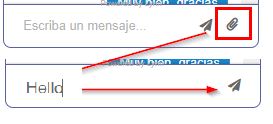
Hide File Send Button When Typing: When selected, this field displays the file send button only when no text is entered in the text box.
Download Transcription Section
This section enables a tab that allows the user to download the transcription of the conversation conducted within the chat. Here, the title, subtitle, button description, and check activation can be configured.
![]()
![]()
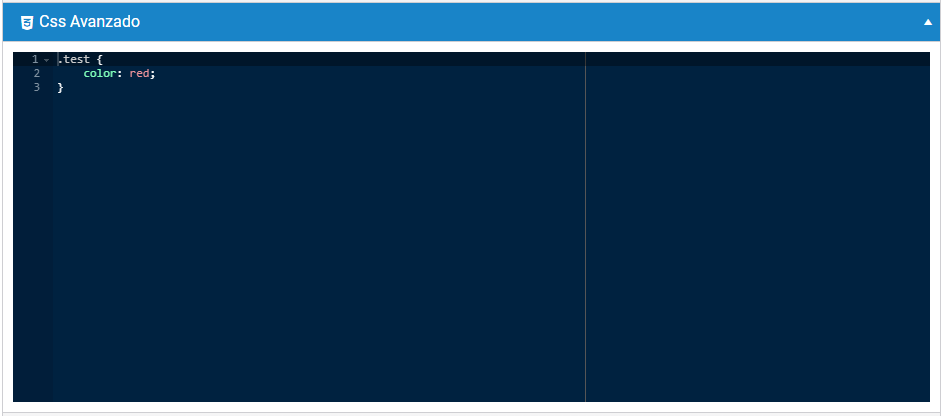
Advanced Section
In this section, direct adjustments to the widget css can be made. If the client has the support of a web designer, a stylesheet can be defined to overwrite the basic widget styles.
Tips
The design changes are not reflected on the widget.
You can put this link on the browser.
https://lynn-latam-production-br-ch-reg-t{IdApp}.azurewebsites.net/widget/refreshcss
The {IdApp} text must be replaced with the app identifier, as shown in the example below.
https://lynn-latam-production-br-ch-reg-t31.azurewebsites.net/widget/refreshcss
When this link is invoked the widget environment is cleared and design is loaded again from Lynn.
Including the Widget on the Client's Website
To integrate the widget on the client's website, a JavaScript script must be included, which is responsible for loading all the necessary elements to ensure the widget works correctly.
Below is the script that must be added to the webpage:
<script>
    (function (window, document, scriptTagName, globalName, scriptAddress, scriptElement, otherScriptElement) {
    window['ChatLynn-Widget'] = globalName;
    window[globalName] = window[globalName] || function () {
    (window[globalName].q = window[globalName].q || []).push(arguments);
    window[globalName].s = scriptAddress;
    };
    scriptElement = document.createElement(scriptTagName);
    otherScriptElement = document.getElementsByTagName(scriptTagName)[0];
    scriptElement.async = 1;
    scriptElement.src = scriptAddress;
    otherScriptElement.parentNode.insertBefore(scriptElement, otherScriptElement);
    })(window, document, 'script', 'mw', 'XXXXXX');
    mw('create', '', { }, {});
</script>
The XXXXXX should be replaced by the URL of the widget corresponding to your tenant. This script will load the widget onto the page.
Widget Customization
If it is necessary to send additional parameters in the interaction, such as personalized user data or specific configurations, you can adjust the last line of the script:
mw(<1st parameter>, <2nd parameter>, <3rd parameter>, <4th parameter>);
The parameters consist of the following:
1st parameter: Reserved for internal use.
2nd parameter: Criteria variable.
3rd parameter: User-specific information (e.g., user ID or department).
th parameter: Additional settings (e.g., the name of the executive who will handle the interaction).
Example:
mw('create', 'uid', {page_name: Consultas}, {executiveName:"Julio Pérez"});
Steps for Configuring Public and Private Portals
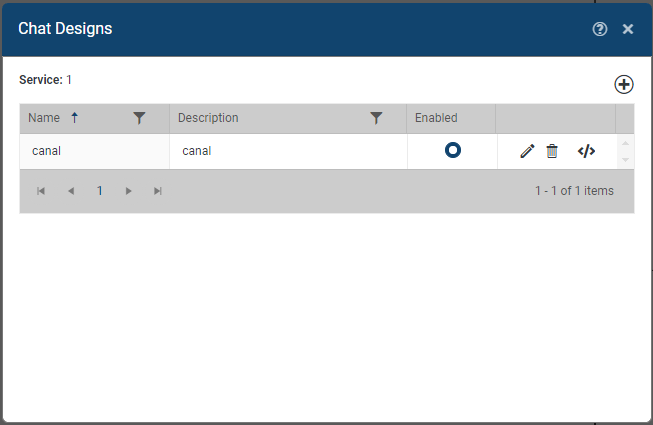
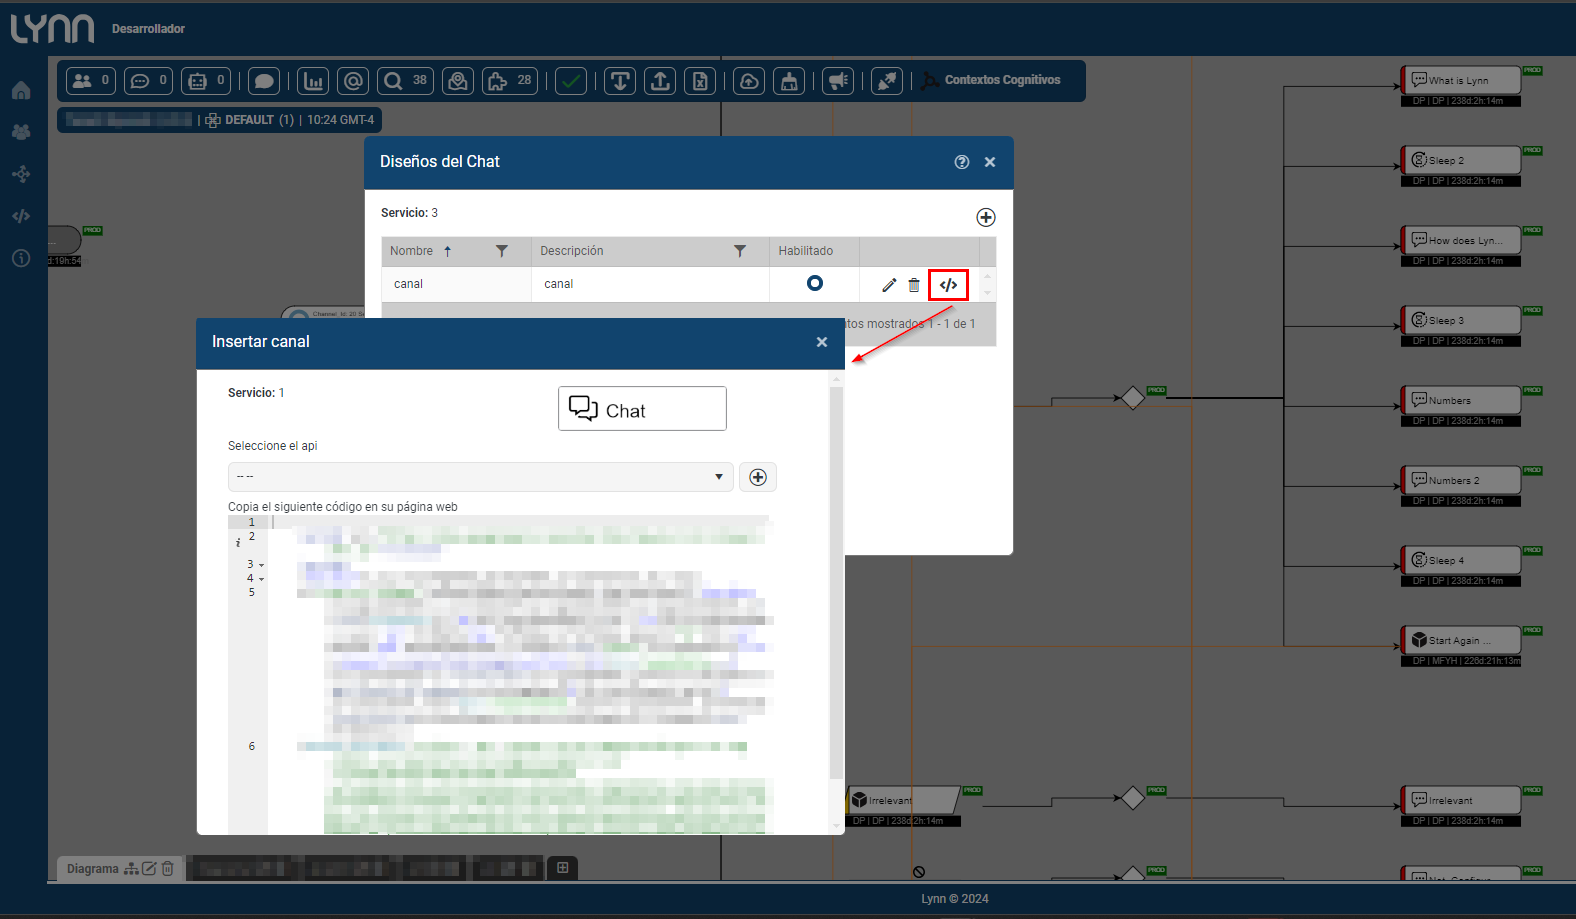
Access Chat Design: Go to the flow designer, and in the Widget channel properties, under "Chat Design," check if a style has already been created. If not, create a new one using the "+" button. It’s essential to customize the widget style to align with your brand's image.
Include the Script on the Client’s Page: To activate the widget, you must include a specific script on the client's website. Ensure you copy the relevant code segment. Verify the type of script needed depending on whether it’s for a public or private portal.
Note: To configure a custom style for the client, refer to our documentation in the Resource Center. Access it through the following link: Widget Customization Guide
Public Portal
The widget on the client’s website can be configured for public use, meaning no authentication data will be required for access. In this scenario:
Token, Script, and Validator: These values will be the same for all sessions initiated by users. They do not change between sessions.
Privacy of Interactions: It’s crucial to note that a session initiated by one user (User A) cannot be shared with or accessed by another user (User B). This ensures that each interaction is completely private and isolated, maintaining data confidentiality.
This approach is ideal for portals where authentication is unnecessary, offering a uniform experience for all users.
Example of Obtained Public Script
<script>
    (function(w,d,scriptTagName,globalName,scriptAddress,tk,val){
    w['ChatLynn-Widget']=globalName;w[globalName]=w[globalName]||function(){w[globalName].s=scriptAddress;(w[globalName].q=w[globalName].q||[]).push(arguments);};if(tk){w[globalName].t=tk;} if(val){w[globalName].v=val;} var formData=new FormData();formData.append("tk",tk);var request=new XMLHttpRequest();request.open("POST",scriptAddress,true);request.onreadystatechange=function(){if(this.readyState===4){scriptElement=d.createElement(scriptTagName);otherScriptElement=d.getElementsByTagName(scriptTagName)[0];scriptElement.async=1;scriptElement.text=this.responseText;otherScriptElement.parentNode.insertBefore(scriptElement,otherScriptElement);}};request.send(formData);})
    (window, document, 'script', 'mw', 'XXXXXX');
    mw('create', '', { }, {});
</script>
Note: In the line (window, document, 'script', 'mw', 'XXXXXX');, the value 'XXXXXX' represents the public Token.
Private Portal
The widget on the client’s website can be used privately.
The private version of the widget includes credentials directly provided by Lynn in each communication session, enabling server-to-server interaction with Lynn's CreateToken API. This API validates the credentials and generates a unique token and validator that the client’s backend exchanges with Lynn to authorize a new session.
It’s important to note that each new session will generate a new token, ensuring each session is unique. The process unfolds as follows:
Step 1: Token Creation: The client’s backend communicates with Lynn’s backend to generate a token.
Step 2: Token Validation: The client’s backend sends the token to the frontend (browser) for validation.
Step 3: Script Retrieval: The frontend uses the token to request the script from Lynn's backend, completing the interaction.
Example of Obtained Private Script
<script>
    (function(w,d,scriptTagName,globalName,scriptAddress,tk,val){
    w['ChatLynn-Widget']=globalName;w[globalName]=w[globalName]||function(){w[globalName].s=scriptAddress;(w[globalName].q=w[globalName].q||[]).push(arguments);};if(tk){w[globalName].t=tk;} if(val){w[globalName].v=val;} var formData=new FormData();formData.append("tk",tk);var request=new XMLHttpRequest();request.open("POST",scriptAddress,true);request.onreadystatechange=function(){if(this.readyState===4){scriptElement=d.createElement(scriptTagName);otherScriptElement=d.getElementsByTagName(scriptTagName)[0];scriptElement.async=1;scriptElement.text=this.responseText;otherScriptElement.parentNode.insertBefore(scriptElement,otherScriptElement);}};request.send(formData);})
    (window,document,'script','mw','<GeneratedWidgetUrlByLynn>','<tokenHere>','<validationHere>');
    mw('create','uid',{uid:"3453-6789"},{});
</script>
Note: that in the line (window,document,'script','mw','
',' ',' ');
| Field | Description |
|---|---|
| aquiUrl/widget/widget | This field varies according to the application and must be provided by the Lynn application. |
| aquiToken | This parameter represents the authentication token required to validate the session or access to the widget from the frontend. The token is generated by Lynn's backend and is unique for each session. |
| aquiValidation | This field refers to an additional validation code used to confirm that the token received is valid. It is a security mechanism to validate both the token and the user's session before granting full access to the widget. |